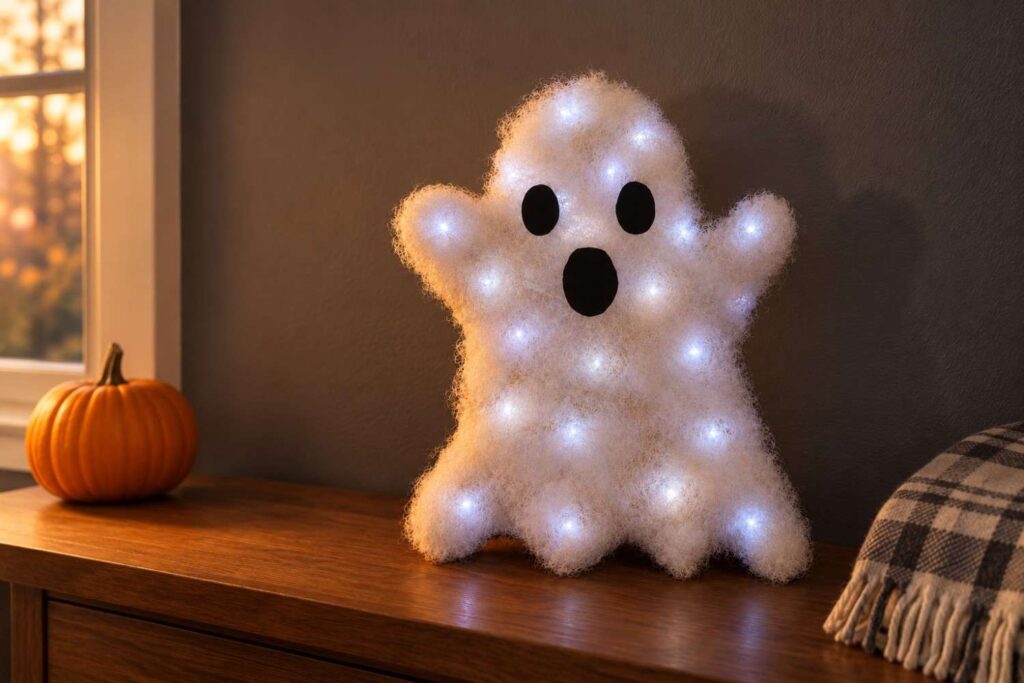
This DIY glowing ghost lamp is a fun way to brighten a dark corner for Halloween. It is made with recycled cardboard, soft fiberfill, and battery-operated fairy lights, so you do not need expensive craft supplies.
The fluffy surface gives the ghost a soft, cloud-like look during the day. After dark, the tiny lights shine through the fiberfill and create a gentle spooky glow. Place it on a shelf, hang it on a wall, or use it as part of your Halloween party decor.
If you enjoy simple seasonal projects, explore these easy Halloween crafts for more ways to decorate your home.
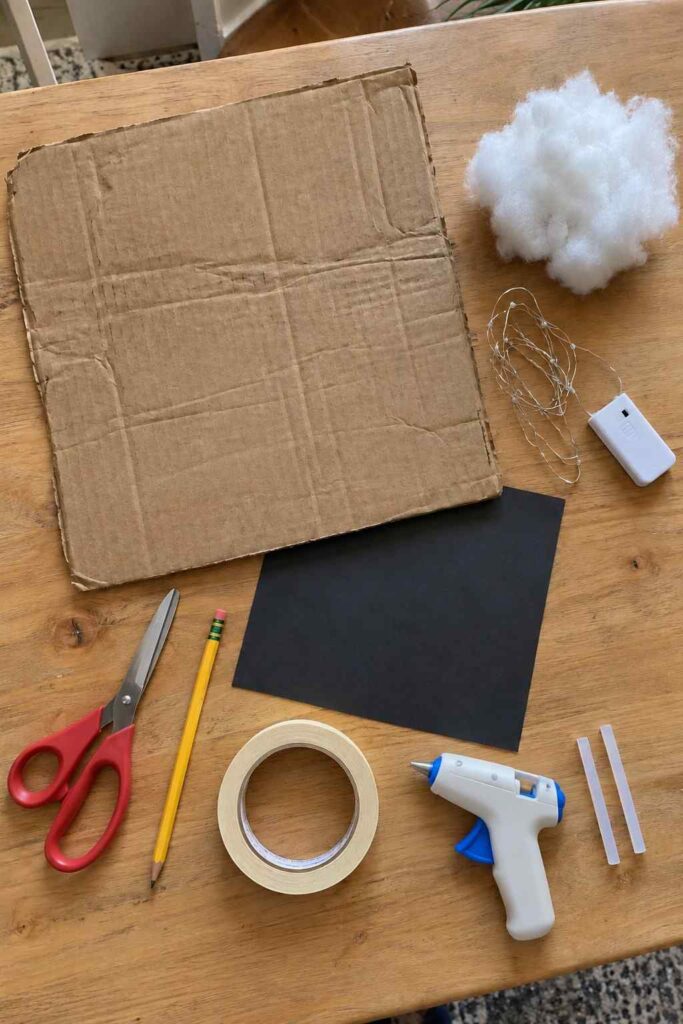
What You’ll Need
- One piece of thick corrugated cardboard, about 18 × 24 inches
- White polyester fiberfill
- One strand of battery-operated LED fairy lights
- Black craft paper or black felt
- Pencil
- Scissors
- Masking tape
- Low-temperature hot glue gun
- Two glue sticks
Project time: About 45 minutes
Difficulty: Easy
Estimated cost: $8–$15
How to Make a DIY Glowing Ghost Lamp
Step 1: Gather Your Materials
Gather all your supplies before you begin. You can cut a piece from an old shipping box instead of buying new cardboard. Choose a firm piece without wet or badly crushed areas.
Test the fairy lights to make sure they work, and then switch them off. Battery-operated LED lights are best because they stay cool and do not require a nearby outlet.
Step 2: Draw the Ghost Shape
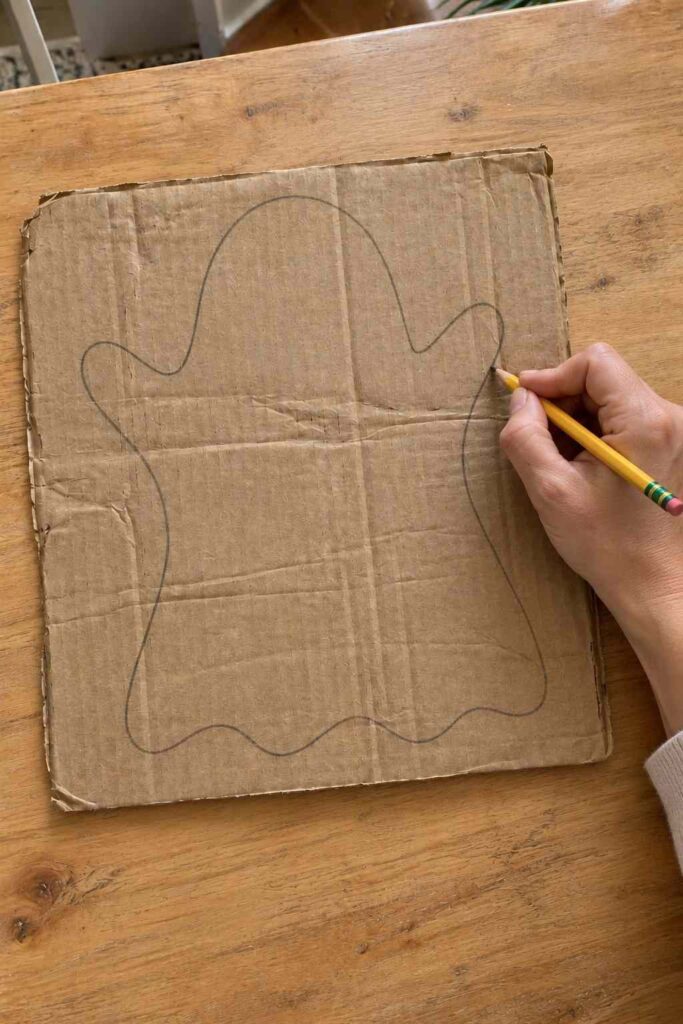
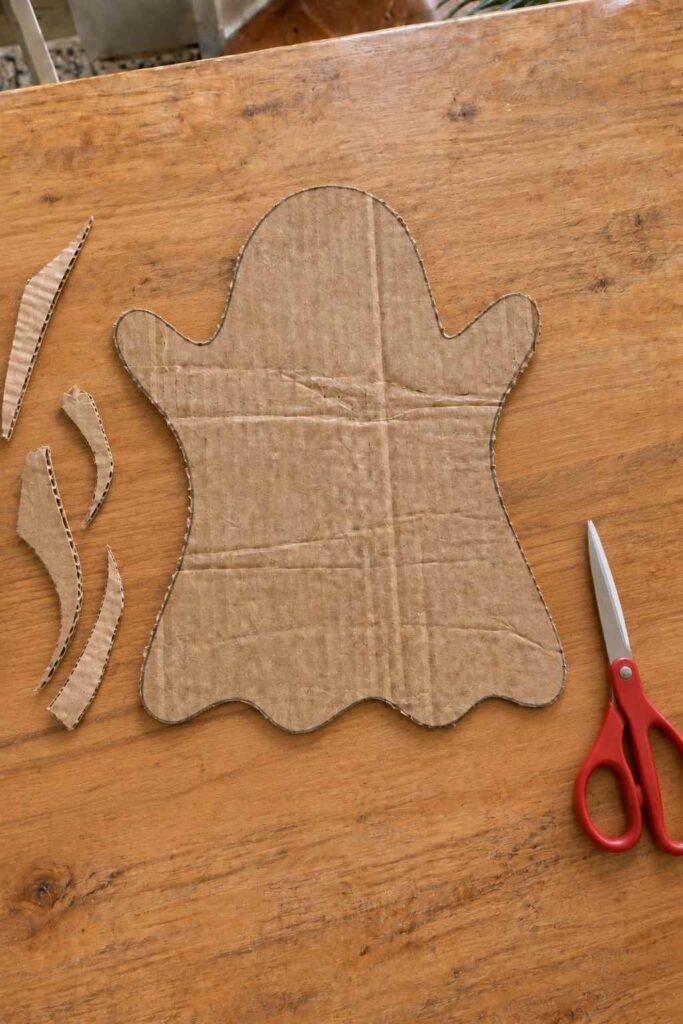
Place the cardboard flat on your work surface. Use a pencil to draw a large ghost with a rounded head, two raised arms, and a slightly wavy bottom.
The shape does not need to be perfectly even. Small differences between the two arms will make the finished ghost look more handmade.
Step 3: Cut Out the Cardboard Ghost
Carefully cut along the pencil line with sturdy scissors. Turn the cardboard as you work instead of forcing the scissors around tight curves.
Smooth any loose cardboard fibers with your fingers, but do not worry about making every edge perfect. The fiberfill will cover most small imperfections.
Step 4: Arrange the Fairy Lights
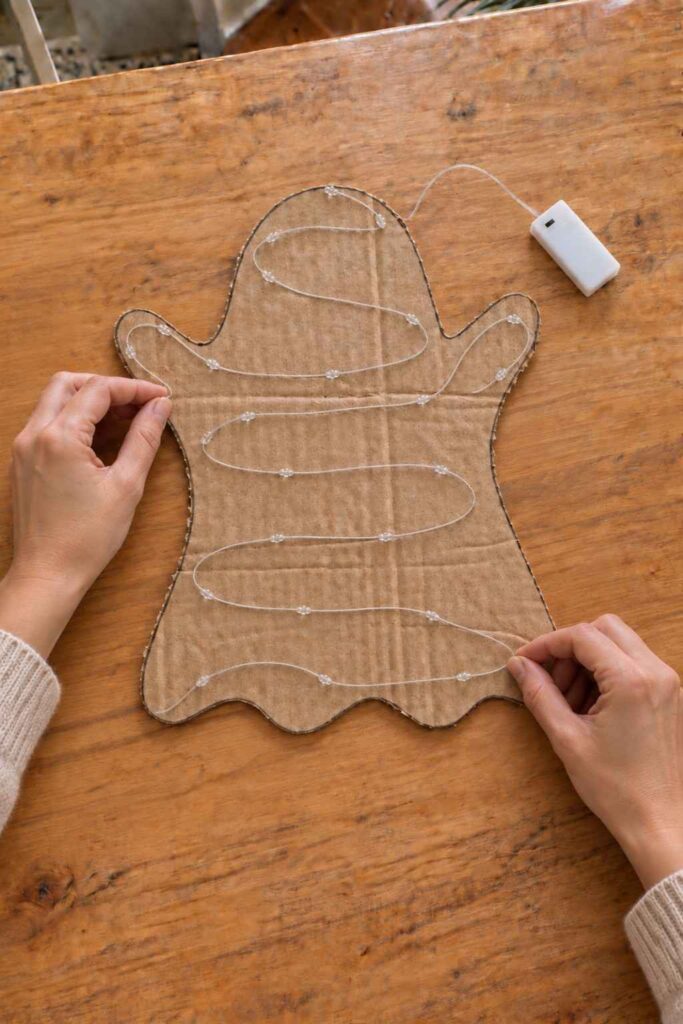
Place the cutout with its front side facing up. Spread the fairy-light wire across the head, body, arms, and lower section of the ghost.
Keep the bulbs a few inches apart so the finished lamp glows evenly. Leave the battery pack behind the cardboard where it will remain easy to reach.
Step 5: Secure the Light Wire
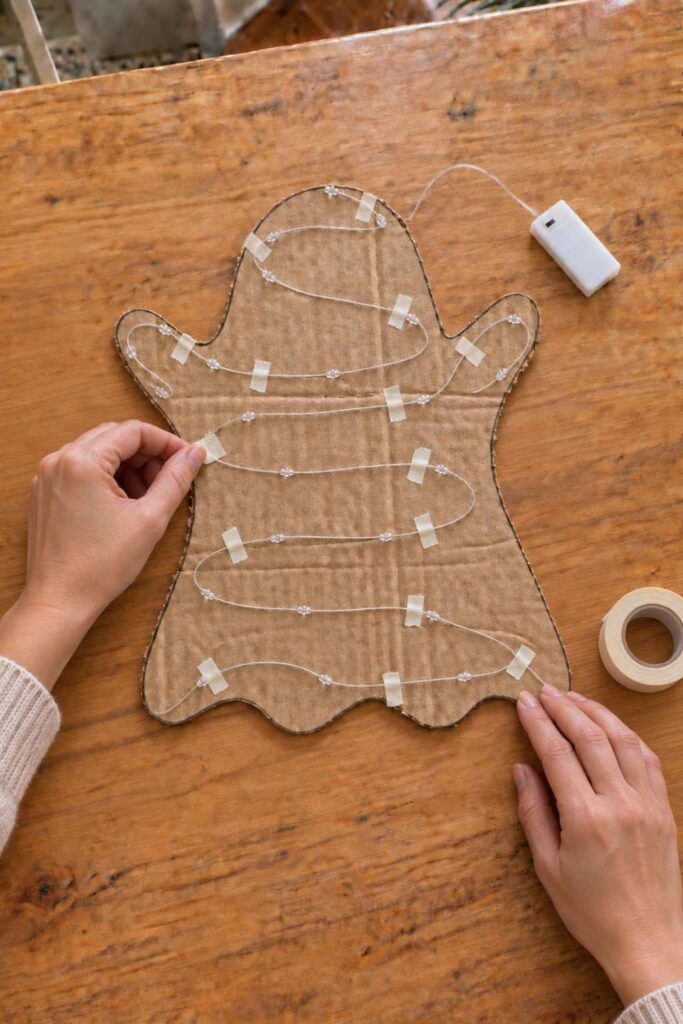
Use short pieces of masking tape to hold the wire against the cardboard. Place the tape between the bulbs so the lights remain uncovered.
Do not pull the thin wire too tightly. Leave a little slack around the arms and curved edges to prevent the wire from breaking.
Step 6: Add the Fluffy Fiberfill
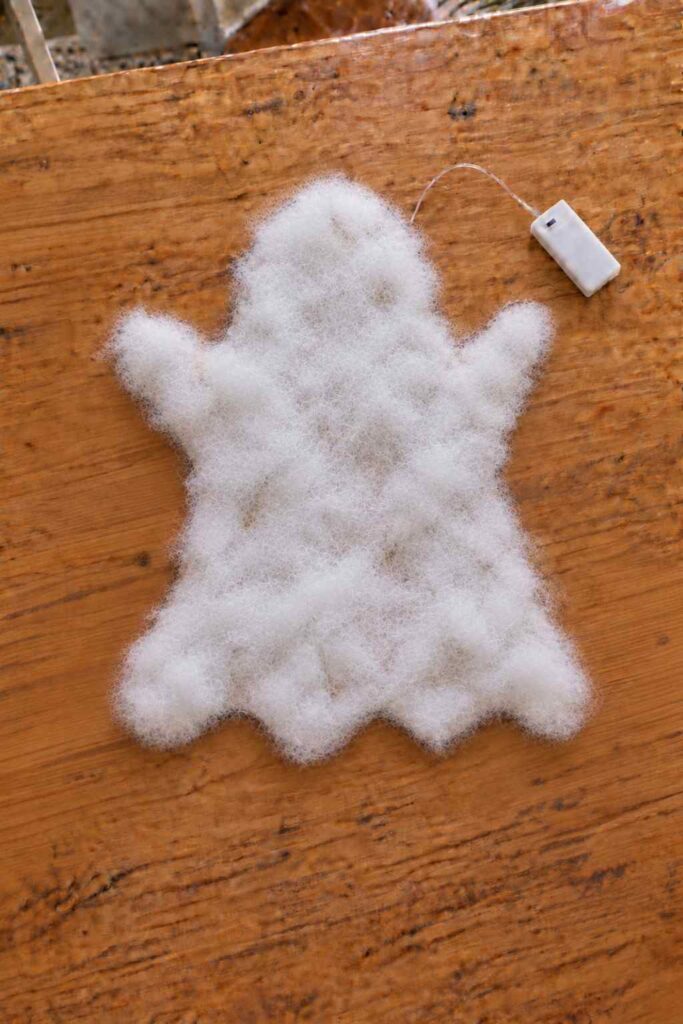
Pull the fiberfill apart into thin, uneven sections. Working in small areas, add a few dots of low-temperature hot glue to the cardboard and gently press the fiberfill into place.
Cover the cardboard and taped wires, but avoid placing glue directly on the bulbs. Add a second thin layer anywhere the brown cardboard is still visible.
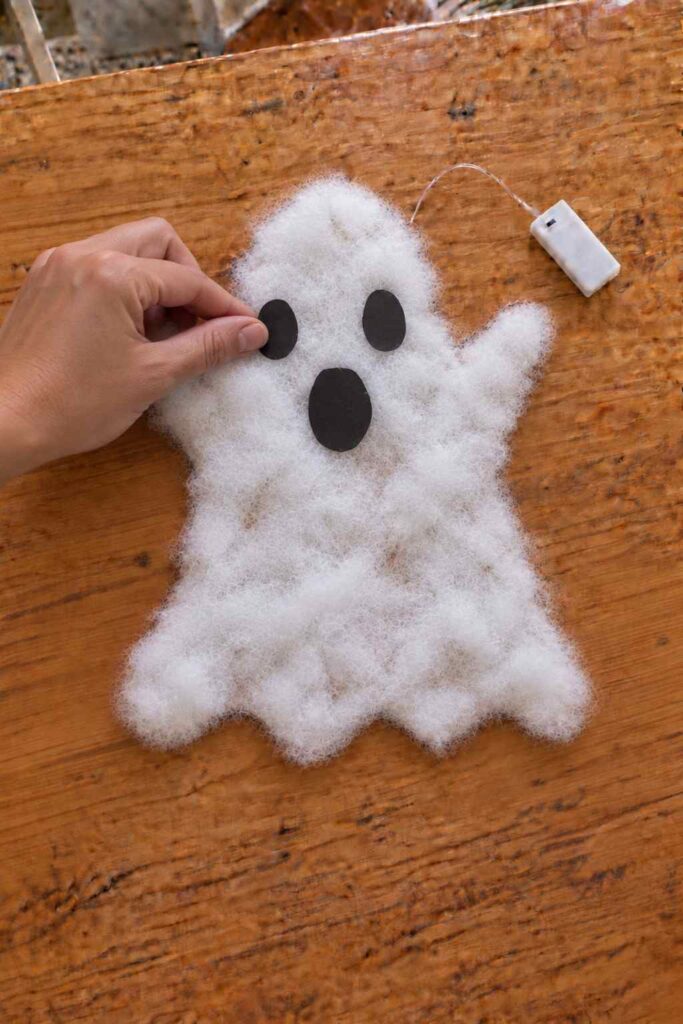
Step 7: Make the Ghost’s Face
Cut two oval eyes and one open mouth from black craft paper or felt. Make the mouth slightly larger than the eyes to give the ghost a surprised expression.
Arrange the pieces on the fiberfill before gluing them down. Once you like the placement, secure each piece with a small amount of glue.
Step 8: Turn On the Ghost Lamp
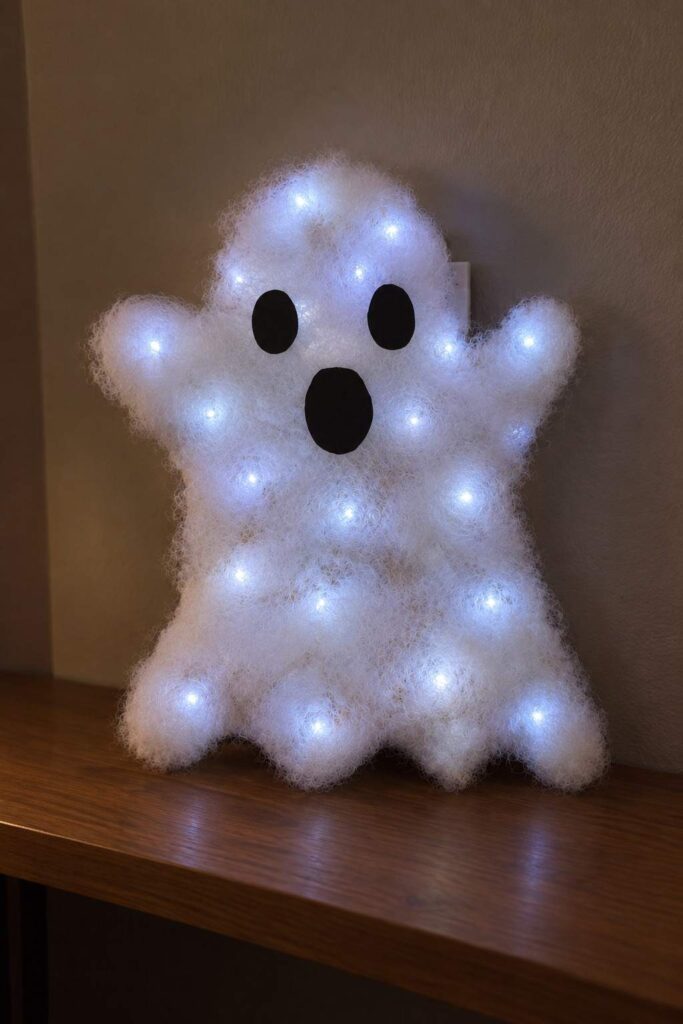
Check that the battery pack is secure and still easy to open. Switch on the fairy lights and dim the room to see the ghost begin to glow.
Display it on a shelf or attach it to the wall with a removable picture-hanging strip rated for its weight. Keep the battery switch within reach so you can turn it off easily.
Important Safety Tips
Use only battery-operated LED fairy lights that remain cool. Do not use incandescent lights, candles, or any bulb that produces heat near cardboard and fiberfill.
An adult should handle the hot glue gun and help with cutting thick cardboard. Never leave the lights on while you are sleeping or away from home.
Easy Ways to Display Your Ghost
Place the ghost against a dark wall to make its white shape and tiny lights stand out. It can also look cute above a Halloween treat table, on a covered mantel, or in a child’s bedroom during a supervised Halloween party.
For a larger display, make two or three ghosts in different sizes. Give each one a slightly different face so the group feels playful instead of perfectly matched.
Final Thoughts
This DIY glowing ghost lamp turns an old piece of cardboard into cute Halloween decor. The fluffy surface looks playful during the day, while the hidden fairy lights create a soft glow after dark.
Try making a smaller matching ghost with a different face. Since every outline and fiberfill layer will look slightly different, each ghost will have its own handmade personality.
For more affordable projects made from everyday supplies, browse these waste material DIY projects.
Pair this craft with our free printable pumpkin coloring pages for an easy Halloween activity night.