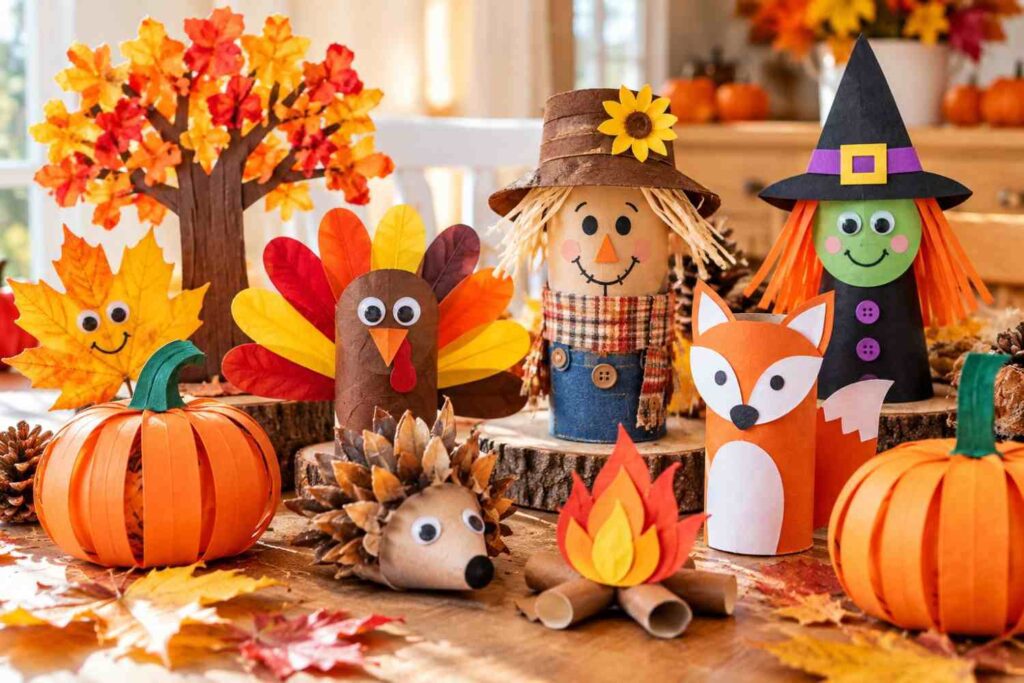
Fall is one of the best times of the year to enjoy fun and creative activities with kids. Colorful leaves, cozy afternoons, and beautiful autumn colors make it the perfect season for little hands to create something special.
If you’re looking for easy fall crafts for kids, these simple DIY ideas are a great place to start. You don’t need expensive supplies or complicated materials. Many of these projects use everyday items like paper, cardboard, toilet paper rolls, and leaves collected from your backyard.
These crafts are perfect for preschoolers, toddlers, and school-age children with a little help from an adult. Kids can cut, glue, paint, and decorate while exploring their creativity and enjoying some quality family time.
From colorful paper decorations to cute leaf animals and fun recycled crafts, there’s something here for every little crafter. Each project includes simple materials and easy-to-follow steps, making it easier to enjoy a creative afternoon at home.
So gather your craft supplies, bring out those colorful fall leaves, and try these 21 Easy & Creative Fall Crafts for Kids to Make at Home. They’re budget-friendly, fun to make, and a lovely way to celebrate the beauty of autumn together!
Looking for more seasonal activities? You might also enjoy these Easy Halloween Crafts for decorating your home with handmade creations.
21 Easy & Creative Fall Crafts for Kids
1. Cute Paper Apple Craft for Kids
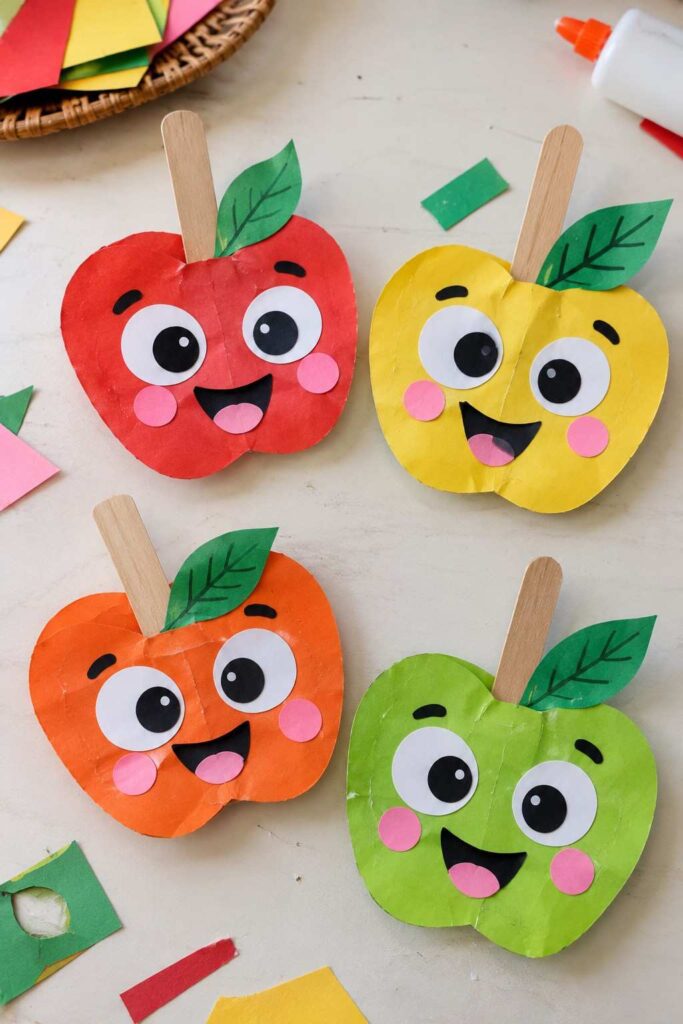
Turn colorful construction paper into cheerful little apple characters with big eyes and funny smiles. This easy fall craft is great for preschoolers and kindergarteners, and kids can give each apple its own expression.
Materials Needed
- Red, yellow, or green construction paper
- White, black, and pink paper scraps
- Green paper for leaves
- Glue stick
- Child-safe scissors
- Brown marker
How to Make It
- Fold a sheet of colored paper in half and draw a simple apple shape. Cut it out to make two matching pieces.
- Glue the pieces together around the edges, leaving the top open if you want a slightly raised, 3D look.
- Cut out two white circles for the eyes, smaller black circles for the pupils, pink circles for the cheeks, and a smiling mouth from black paper.
- Glue the face onto the apple, then add a small green paper leaf and draw its veins with a marker.
Quick Tip: Try red, yellow, and green apples with different expressions to make a cute little fall apple family. ye best hai ise aur profesnol blog dijain banane ke liye kuch styleish banao jyse number ko box me ya color style esa kuch
2. Easy Autumn Leaf Animals for Kids
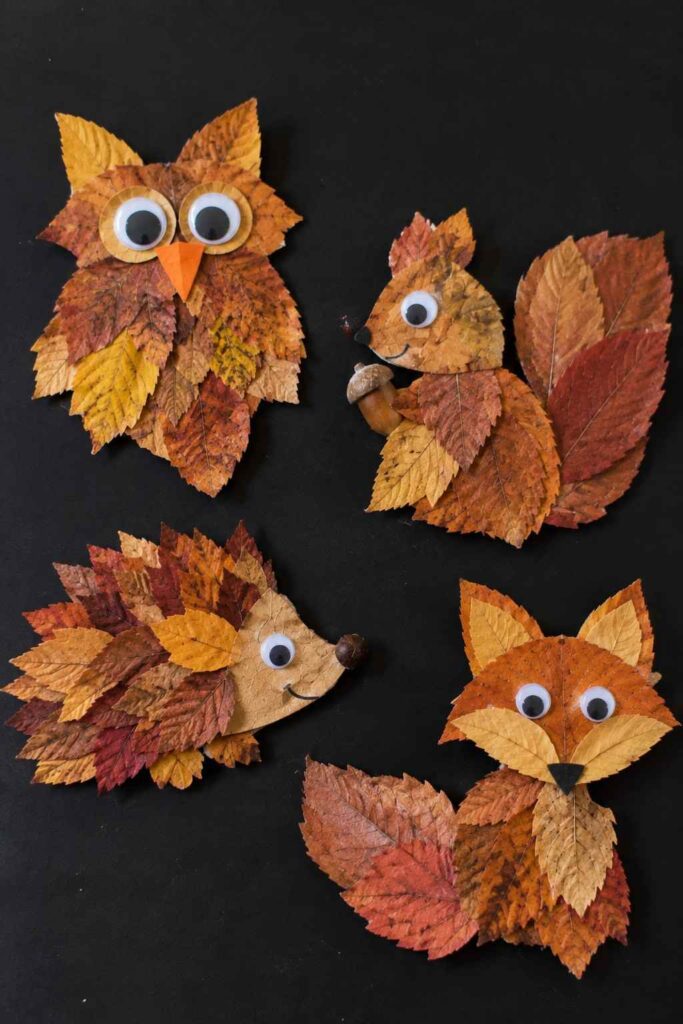
Turn colorful fall leaves into cute woodland animals like owls, foxes, and hedgehogs. This simple nature craft lets kids explore autumn colors while creating their own little leaf creatures.
Materials Needed
- Dry autumn leaves in different shapes and colors
- White paper or cardstock for the base
- Googly eyes or small paper circles
- Glue stick or craft glue
- Small pieces of orange, brown, and black paper
- Child-safe scissors
How to Make It
- Collect colorful fallen leaves and gently press them inside a book until they flatten.
- Choose a large leaf for the animal’s body and arrange smaller leaves around it for ears, wings, or a bushy tail.
- Glue the leaves onto white cardstock to hold the design together.
- Add paper eyes, a small nose, and a beak or mouth to turn the leaves into an owl, fox, or hedgehog.
Quick Tip: Try overlapping leaves in different autumn shades to give each animal a unique, handmade look.
3. Easy Paper Chrysanthemum Flower Craft for Kids
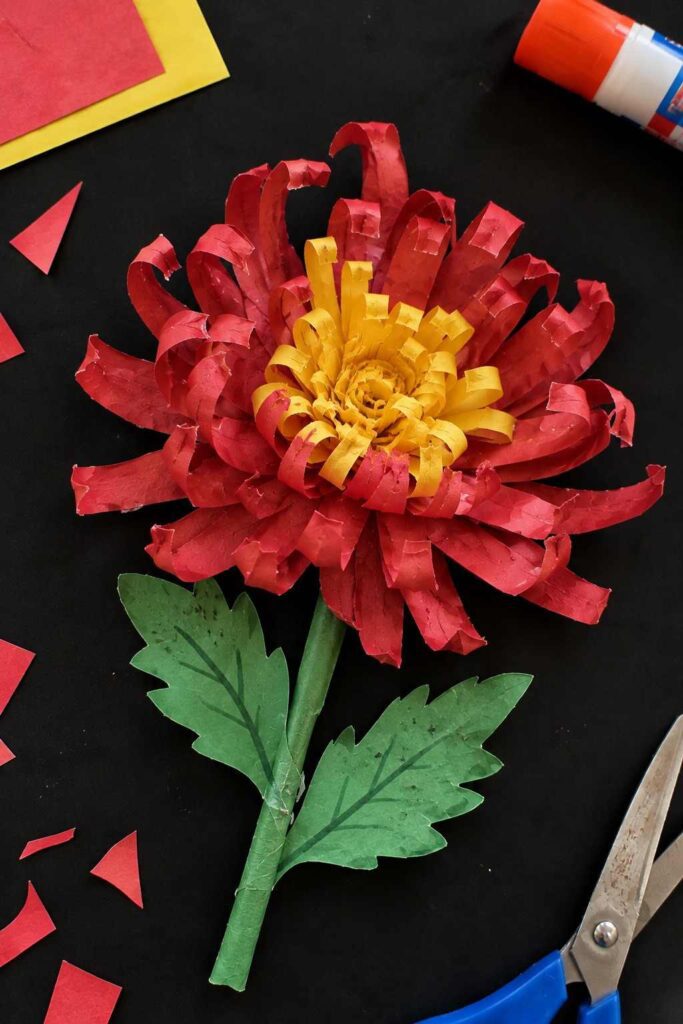
This colorful paper chrysanthemum is a fun fall craft for kids, inspired by the rich red and golden flowers often seen in autumn. Curled paper petals give the flower a fluffy look, while the green paper stem and leaves make it perfect for a handmade fall bouquet or classroom decoration.
Materials Needed:
- Red or dark pink construction paper
- Yellow construction paper
- Green construction paper
- Glue stick
- Child-safe scissors
- Pencil
How to Make It:
- Cut red paper into several long strips. Carefully curl each strip around a pencil to create loose petals.
- Cut a small yellow strip, make tiny cuts along one edge, and roll it tightly to create the flower center.
- Glue the red petals around the yellow center in several layers, allowing some petals to overlap naturally.
- Roll green paper into a stem, cut two leaf shapes, and glue them beneath the flower.
Quick Tip: Let kids curl the petals in different directions. Slightly uneven petals make each handmade flower look unique and natural.
4. Cute Fall Tree Craft with Acorn Name Letters
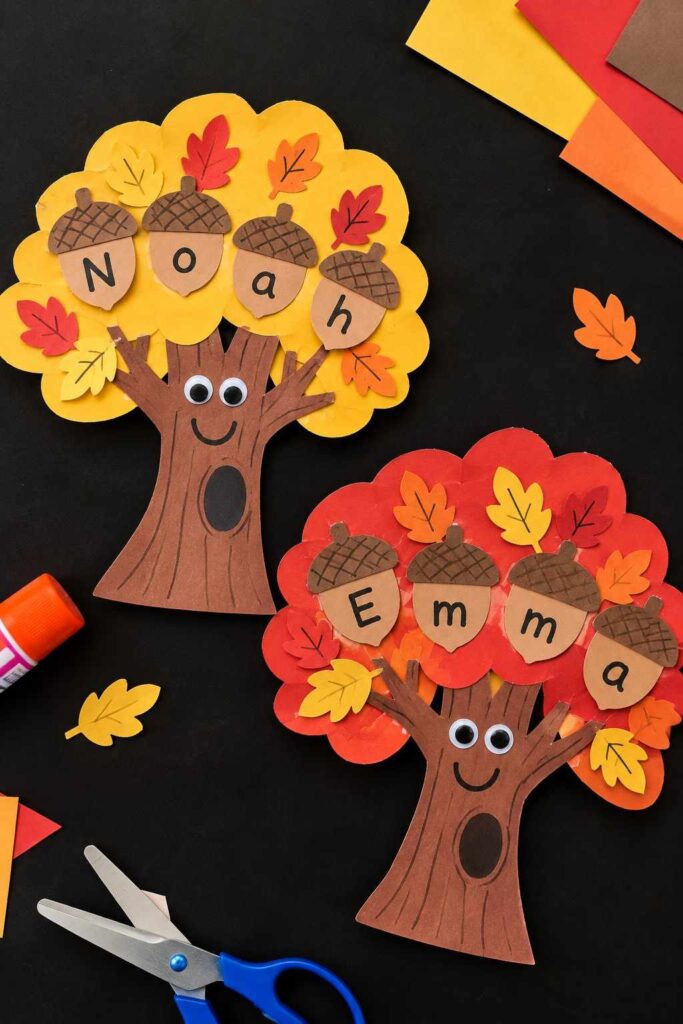
Turn simple construction paper into a colorful fall tree that kids can personalize with their own names. Bright autumn leaves, a friendly tree face, and little paper acorns with letters make this a fun activity for preschoolers and kindergarteners.
Materials Needed:
- Brown, yellow, orange, and red construction paper
- Light brown paper for acorns
- Black marker or crayons
- Glue stick
- Child-safe scissors
- Googly eyes (optional)
How to Make It:
- Draw and cut a tree trunk with branches from brown construction paper.
- Cut a large, cloud-shaped treetop from yellow, orange, or red paper and glue it behind the branches.
- Cut small leaves from different fall-colored papers and glue them onto the treetop.
- Make small acorn shapes with brown caps. Write one letter of the child’s name on each acorn and glue them across the tree.
- Add eyes, a smile, and simple bark lines to finish the friendly tree.
Quick Tip: Use one acorn for each letter of the child’s name to combine fall crafting with a simple spelling activity.
5. Easy Paper Scarecrow Craft for Kids
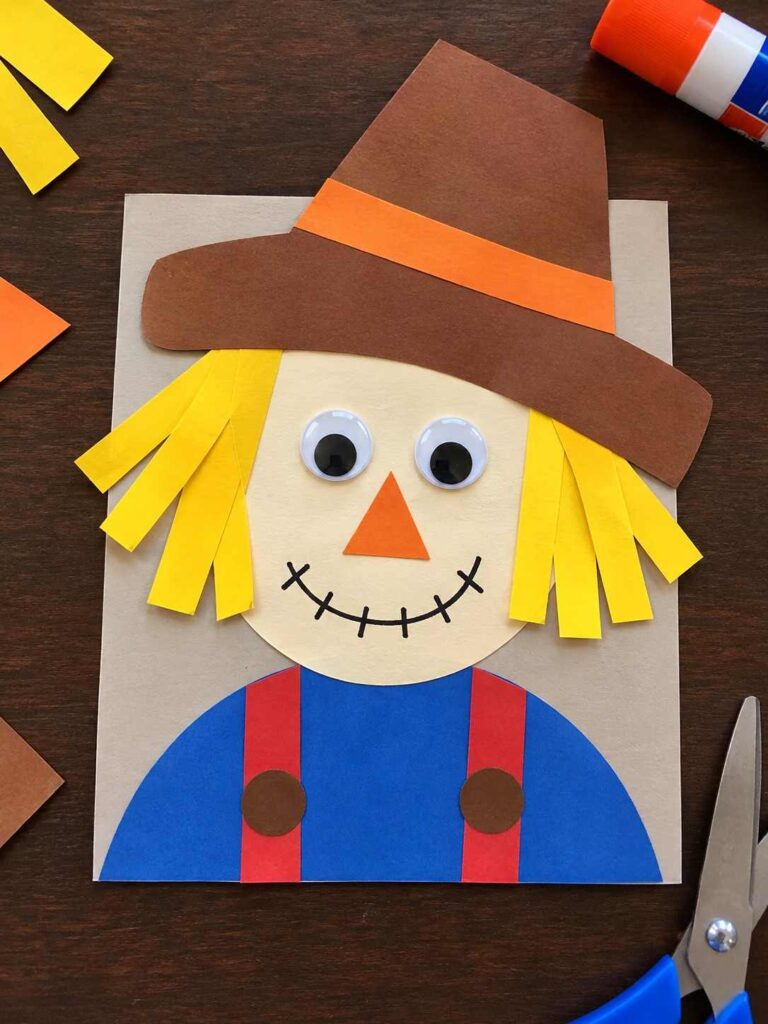
Make a cute fall scarecrow using a few simple pieces of construction paper. With a floppy brown hat, yellow paper-strip hair, and a smiling face, this easy craft is perfect for preschoolers and kindergarteners. Kids can make it at home or use it as a fun autumn classroom decoration.
Materials Needed:
- Brown, yellow, orange, and blue construction paper
- White or cream paper
- Glue stick
- Child-safe scissors
- Black marker
- Googly eyes (optional)
How to Make It:
- Cut a large circle or oval from cream paper for the scarecrow’s face.
- Cut a simple brown hat and glue it to the top of the face.
- Cut several thin yellow paper strips and glue them along both sides of the face for hair.
- Add two eyes, a small orange triangle nose, and a curved smile using a black marker.
- Cut a half-circle from blue paper for the body and glue it beneath the face. Add two red paper strips and small brown circles for suspenders and buttons.
Quick Tip: Keep the shapes large and simple so little kids can cut and glue them more easily.
6. Easy Paper Pie Craft for Kids
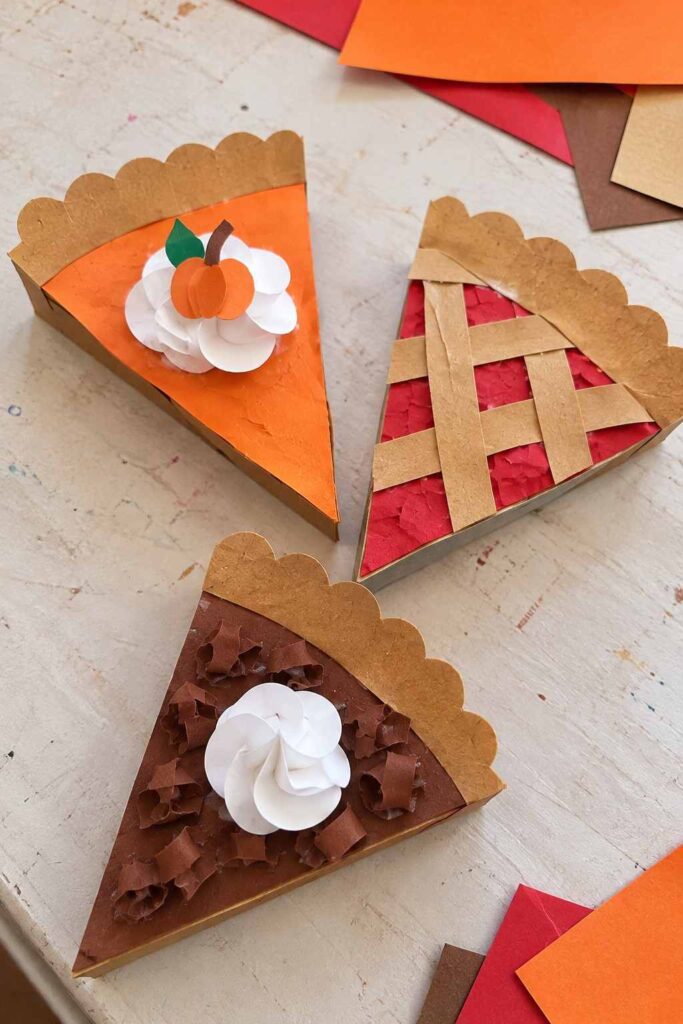
Bring the cozy feeling of fall baking to craft time with these cute paper pie slices. Kids can use construction paper and recycled cardboard to create pumpkin pie, cherry pie, and chocolate pie. This simple Thanksgiving craft is great for preschoolers, kindergarteners, and autumn classroom activities.
Materials Needed:
- Brown construction paper or thin recycled cardboard
- Orange, red, and dark brown paper
- White paper for the whipped cream
- Green paper for a small leaf
- Glue stick
- Child-safe scissors
How to Make It:
- Cut a large triangle from cardboard or brown paper to make the pie slice.
- Cover the triangle with orange paper for pumpkin pie, red paper for cherry pie, or dark brown paper for chocolate pie.
- Cut a few thin strips of brown paper and glue them across the red slice to make a simple lattice crust.
- Tear or cut small pieces of colored paper and glue them onto the pie filling for texture.
- Roll or layer small pieces of white paper to make whipped cream. Add a tiny paper pumpkin or leaf if desired.
Quick Tip: Let kids create just one flavor each, then display all the paper pies together for a colorful fall dessert collection.
7. Funny Paper Plate Witch Craft for Kids
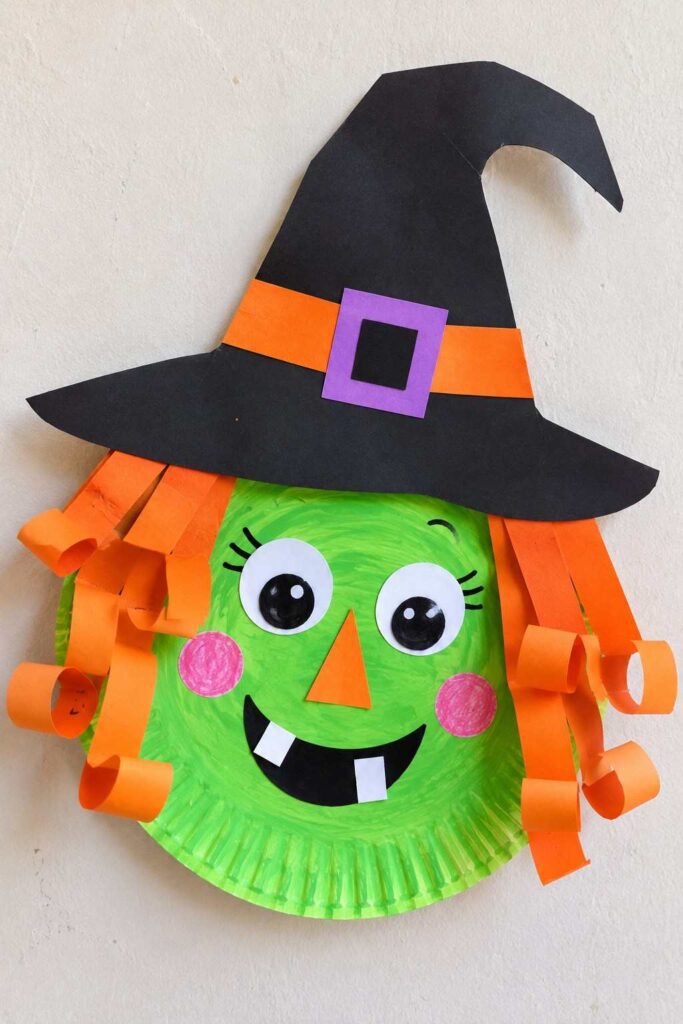
Make Halloween extra fun with this silly paper plate witch! Her bright green face, curly orange paper hair, crooked black hat, and funny buck teeth give this easy craft lots of personality. It’s a great Halloween activity for preschoolers and kindergarteners, using simple materials that are easy to find at home.
Materials Needed:
- 1 paper plate
- Green paint or green construction paper
- Black, orange, purple, and white construction paper
- Glue stick
- Child-safe scissors
- Black marker
How to Make It:
- Paint the paper plate green and let it dry, or cover it with green paper.
- Cut a large witch hat from black paper. Add an orange band and a small purple buckle, then glue it to the top of the plate.
- Cut orange paper into thin strips. Curl some strips around a pencil and glue them along both sides of the face for messy witch hair.
- Add two large paper eyes, an orange triangle nose, and pink paper cheeks.
- Cut a wide black smile and two small white teeth, then glue them onto the face.
Quick Tip: Make the hair extra curly and the teeth a little uneven to give your witch a funny, playful expression!
8. Easy Hanging Paper Witch Craft for Kids
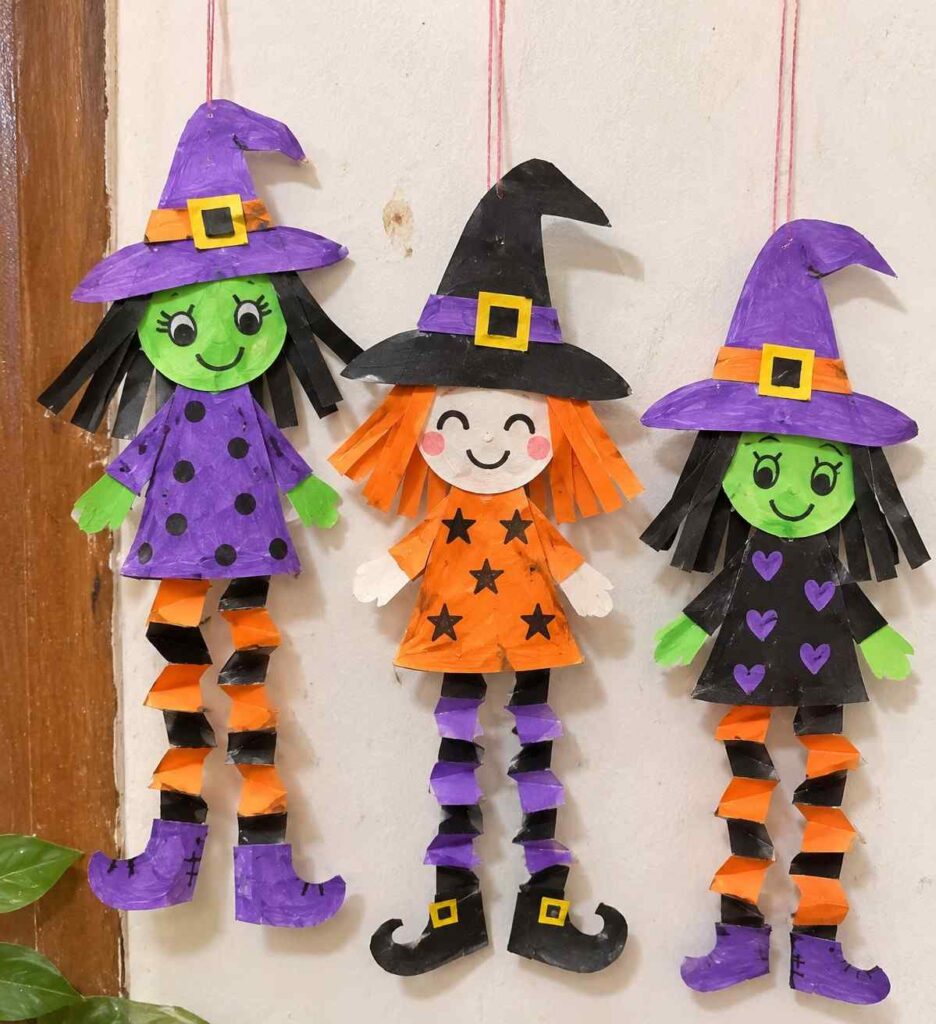
Make Halloween decorations extra playful with these cute hanging paper witches! Their colorful hats, funny faces, paper-strip hair, and zigzag accordion legs make them fun to display in a classroom, doorway, or kids’ room. This simple craft uses inexpensive construction paper and is easy to customize with different colors and expressions.
Materials Needed:
- Black, purple, orange, and green construction paper
- White paper for the face
- String or yarn
- Glue stick
- Child-safe scissors
- Black marker or crayons
How to Make It:
- Cut a circle for the witch’s face and a simple dress shape from colored paper.
- Make a pointed witch hat from black or purple paper, then add a small colored band and buckle.
- Cut thin paper strips for the hair and glue them around the face.
- Fold two long paper strips back and forth like an accordion to make zigzag legs. Attach them beneath the dress and add simple paper boots.
- Draw a funny face, decorate the dress with dots or stars, and tape a piece of string to the back of the hat to hang the witch.
Quick Tip: Make each witch a different color and give them silly expressions to create a fun Halloween display.
9. Marble Fall Leaves Craft for Kids
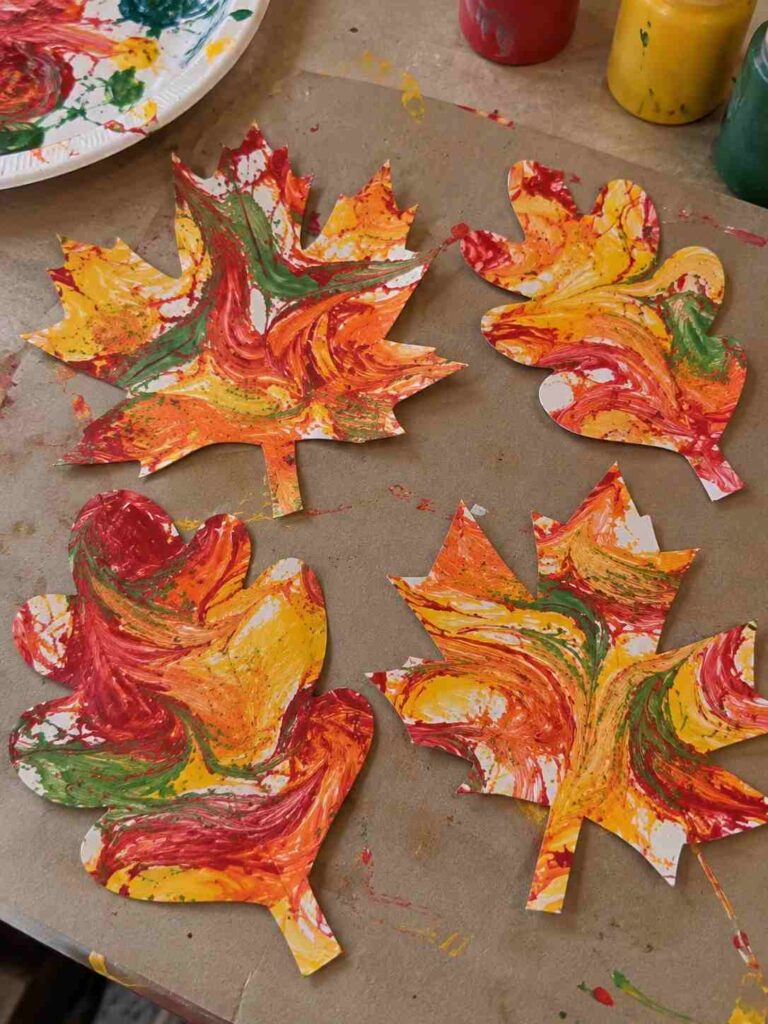
Create colorful autumn leaves with simple paint swirls. Kids can mix fall colors, then cut the painted paper into leaf shapes for a fun, easy fall craft.
Materials Needed:
- White paper
- Red, orange, yellow, and green paint
- Spoon or craft stick
- Pencil and child-safe scissors
How to Make It:
- Add small drops of paint to white paper.
- Gently swirl the colors with a spoon or craft stick.
- Let the paper dry completely.
- Draw leaf shapes and cut them out.
Quick Tip: Don’t mix the colors too much—pretty swirls make every leaf unique.
10. DIY Paper Campfire Craft for Kids
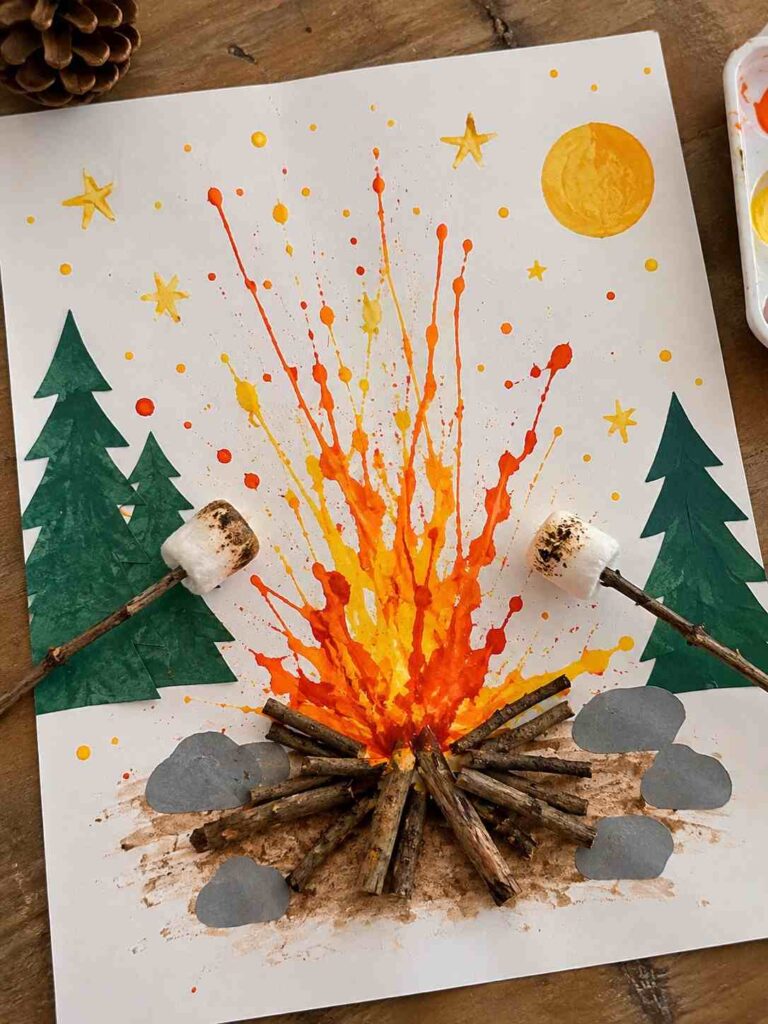
Create a fun little campfire scene using paint and real twigs. Kids can blow paint through a straw to make fiery flames, then add paper trees and tiny sticks for a creative fall camping craft.
Materials Needed:
- White paper or cardstock
- Red, orange, and yellow washable paint
- Straw
- Small twigs
- Green construction paper
- Glue
How to Make It:
- Place small drops of orange and yellow paint near the bottom of the paper.
- Blow gently through a straw to spread the paint upward like flames.
- Add a few red paint drops for extra color and let the paint dry.
- Glue small twigs at the bottom to create a campfire.
- Cut simple green paper trees and glue them on the sides.
Quick Tip: Use only a little watered-down paint so it spreads easily. Young children should have adult supervision, and paint should never be sucked into the straw.
11. Sponge-Painted Fall Trees for Kids
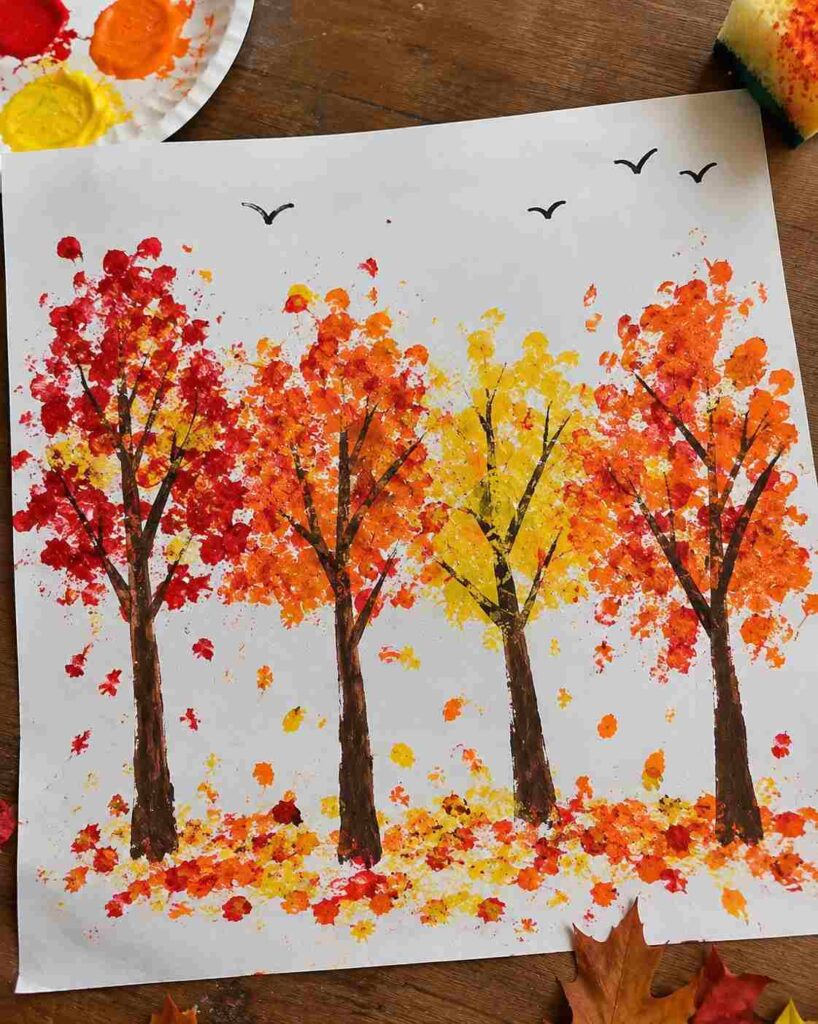
Create a colorful autumn forest with a simple sponge-painting technique. Kids can dab red, orange, and yellow paint around tree branches to make beautiful fall foliage. This easy art project is perfect for preschoolers and kindergarteners.
Materials Needed:
- White paper
- Red, orange, and yellow washable paint
- Small sponge or cotton balls
- Brown or black marker
- Paper plate for paint
How to Make It:
- Draw a few tree trunks and branches on white paper using a brown or black marker.
- Pour small drops of fall-colored paint onto a paper plate.
- Dip a sponge or cotton ball into the paint and gently dab around the branches to create colorful leaves.
- Add a few paint dots beneath the trees to represent fallen leaves.
- Let the painting dry, then draw tiny birds in the sky if desired.
Quick Tip: Let kids overlap the colors and leave a few white spaces for a natural, handmade look.
12. Easy Paper Fall Wreath Craft for Kids
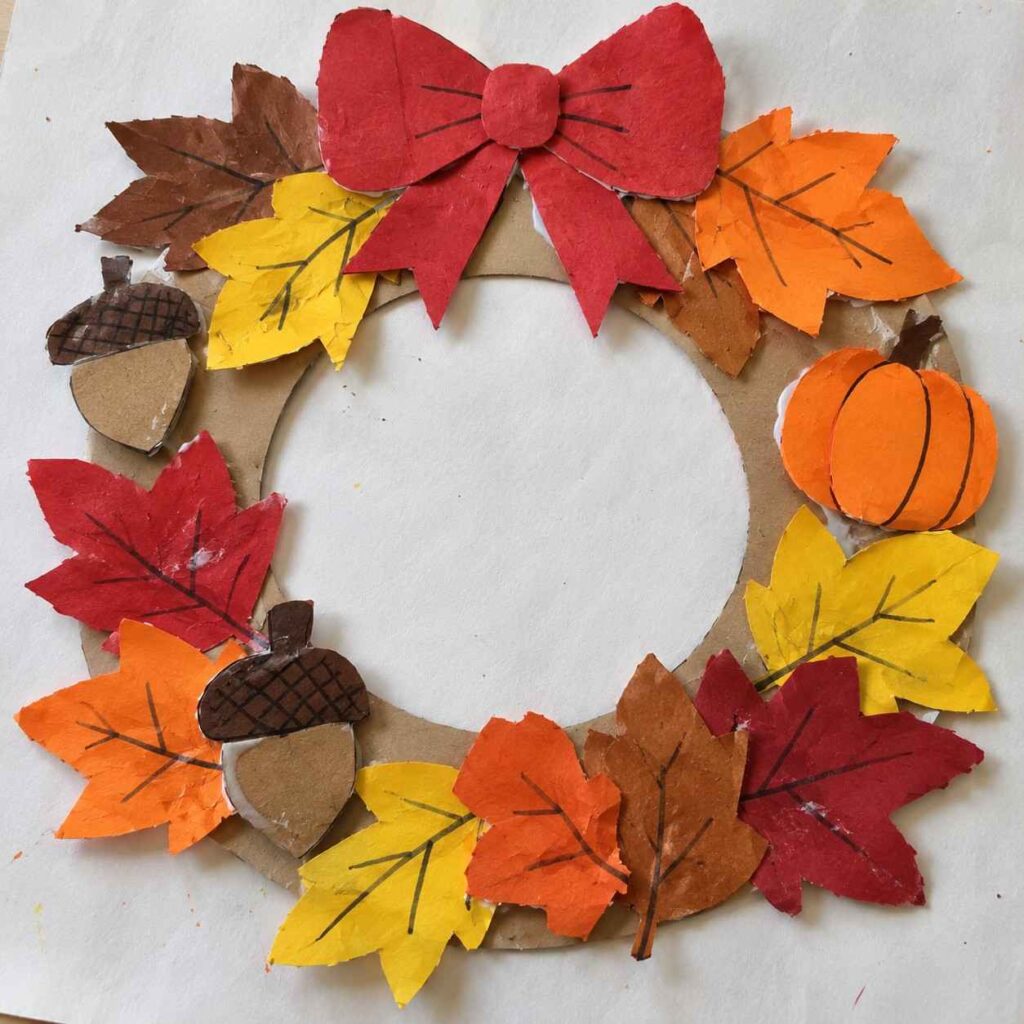
Make a colorful fall wreath using construction paper and a cardboard ring. Bright autumn leaves, little acorns, a paper pumpkin, and a red bow give this simple craft a cozy Thanksgiving look.
Materials Needed:
- Cardboard from an old box
- Red, orange, yellow, and brown construction paper
- Glue stick
- Child-safe scissors
- Black marker
How to Make It:
- Cut a large ring from cardboard to make the wreath base.
- Cut simple leaf shapes from fall-colored paper and draw veins with a marker.
- Make two small paper acorns and an orange paper pumpkin.
- Glue the leaves around the cardboard ring, overlapping them slightly.
- Add the acorns and pumpkin, then finish with a simple red paper bow at the top.
Quick Tip: Don’t worry about perfectly cut leaves. Slightly uneven shapes make the wreath look more like a real handmade kids’ craft.
13. Unique Paper Bag Scarecrow Craft for Kids
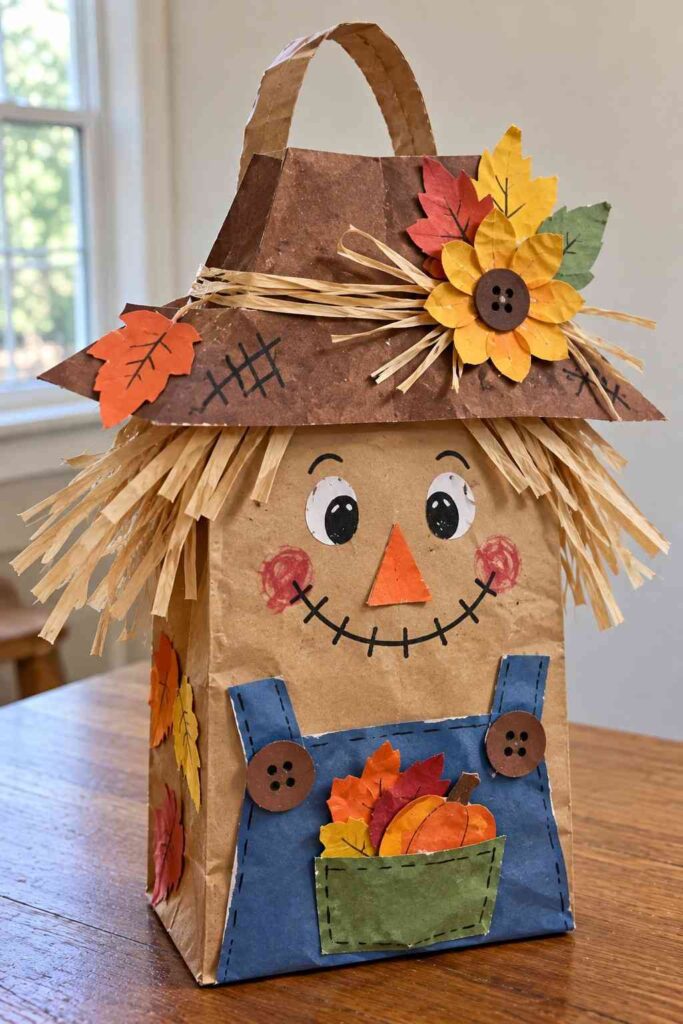
Turn an ordinary brown paper bag into a cute little fall scarecrow! With a floppy patchwork hat, messy straw hair, a funny face, and a tiny pumpkin pocket, this craft makes a lovely Thanksgiving decoration for kids.
Materials Needed:
- Brown paper lunch bag
- Brown, blue, green, orange, and yellow construction paper
- Raffia or thin paper strips
- Glue stick
- Child-safe scissors
- Black marker
- Small buttons (optional)
How to Make It:
- Loosely fill the bottom of the paper bag with crumpled paper so it can stand upright.
- Cut a wide, floppy hat from brown paper. Add a few colorful paper patches and a sunflower.
- Glue raffia or thin paper strips around the top and sides for messy scarecrow hair.
- Draw the eyes, rosy cheeks, triangle nose, and a big stitched smile.
- Cut blue paper for overalls and a small green pocket. Glue them onto the bag.
- Add two paper buttons and tuck tiny paper pumpkins and leaves into the pocket.
Quick Tip: Use leftover paper scraps for the hat and pocket decorations. Slightly uneven shapes give the scarecrow a charming handmade look.
14. Funny Candy Corn Witch Craft for Kids
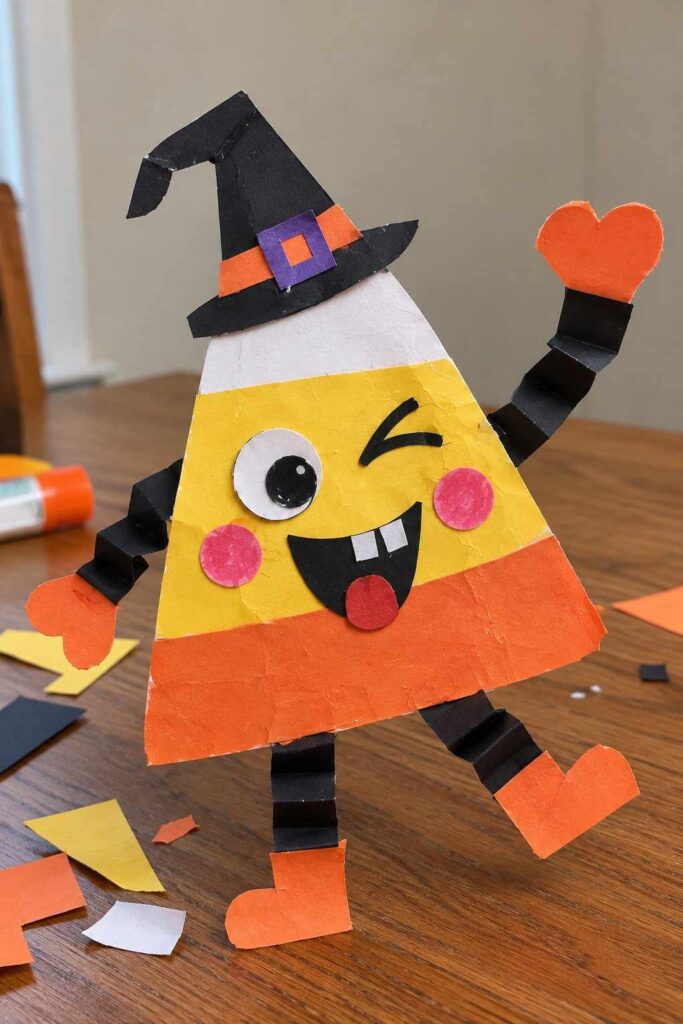
Turn simple construction paper into a silly little Halloween character! This cute candy corn witch has a crooked black hat, a winking face, a big smile, and fun accordion-fold arms and legs. It’s an easy paper craft that kids can make for Halloween decorations.
Materials Needed:
- White, yellow, orange, and black construction paper
- Purple and pink paper scraps
- Glue stick
- Child-safe scissors
- Black marker
How to Make It:
- Cut a large triangle with slightly rounded corners for the candy corn body.
- Add white paper at the top, yellow in the middle, and orange at the bottom.
- Make a crooked witch hat from black paper and add a small purple buckle.
- Fold thin black paper strips back and forth to create arms and legs. Glue them to the body and add orange paper hands and shoes.
- Add one big eye, a winking eye, pink cheeks, and a funny smiling mouth.
Quick Tip: Let kids draw different silly expressions to give their candy corn witch a personality of its own.
15. Toilet Paper Roll Squirrel Craft for Kids
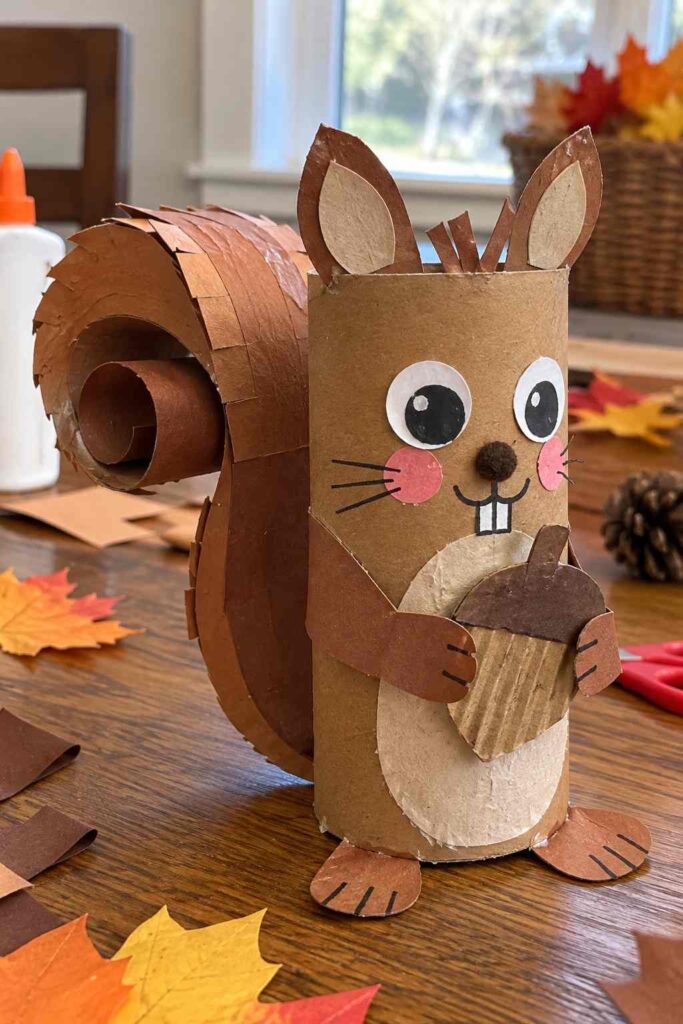
Turn an empty toilet paper roll into an adorable little squirrel holding an acorn! With a big curly tail, tiny ears, and a cute face, this recycled craft is perfect for fall and autumn nature activities.
Materials Needed:
- Empty toilet paper roll
- Brown and light brown construction paper
- Small piece of beige paper
- Brown felt or cardboard for the acorn
- Googly eyes or black paper
- Glue stick
- Child-safe scissors
- Black marker
How to Make It:
- Cover the toilet paper roll with brown construction paper, then add a small beige paper belly.
- Cut two little ears and glue them to the top. Add eyes, a nose, whiskers, and a smiling face.
- Cut a long strip of brown paper, curl it around a pencil, and attach it to the back to make a bushy squirrel tail.
- Cut two small paper arms and feet. Glue them onto the body.
- Make a simple acorn using brown and beige paper, then glue it between the squirrel’s hands.
Quick Tip: Let kids draw their own funny squirrel expressions and use leftover cardboard for the acorn.
16. Easy Paper Cone Halloween Characters for Kids
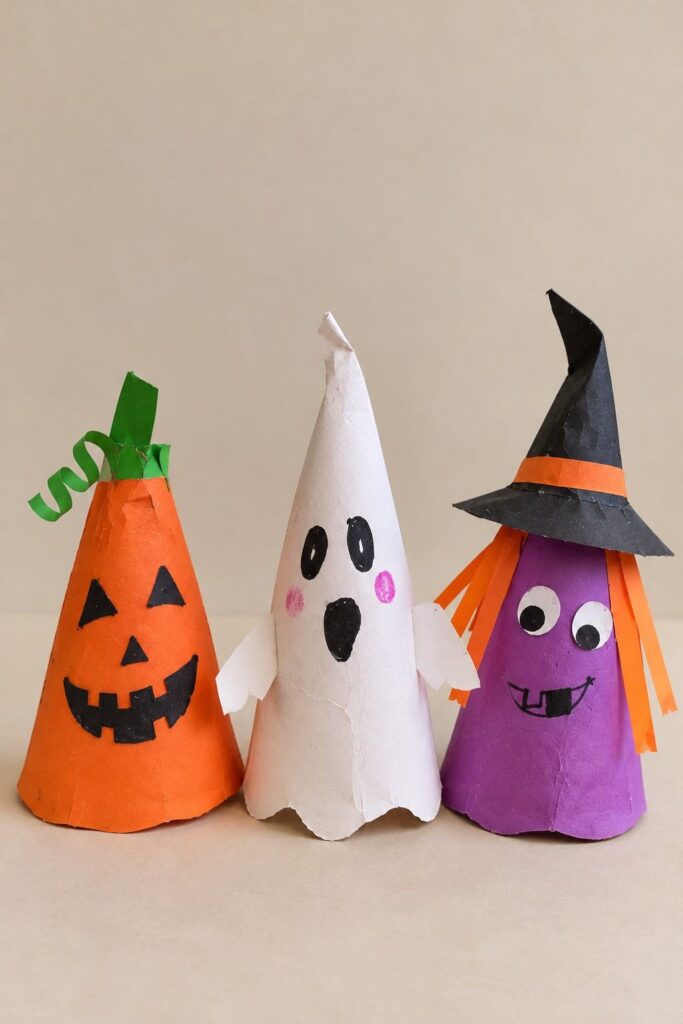
Turn colorful construction paper into cute little Halloween characters! Kids can make a smiling pumpkin, a silly ghost, and a funny witch using simple paper cones. This is an easy fall craft for Halloween decorating at home or school.
Materials Needed:
- Orange, white, purple, black, and green construction paper
- Pink paper scraps
- Glue stick
- Child-safe scissors
- Black marker
How to Make It:
- Roll a sheet of construction paper into a cone shape and glue the edge to hold it in place.
- Trim the bottom so the cone can stand. Make an orange pumpkin, a white ghost, and a purple witch.
- Add simple faces using black paper or a marker. Give the ghost little paper arms and the pumpkin a green curly stem.
- Make a small black witch hat with an orange band and glue it onto the purple cone.
Quick Tip: Let kids create their own funny faces and mix up the colors to make every character different.
17. Colorful Handprint Fall Leaves Craft for Kids
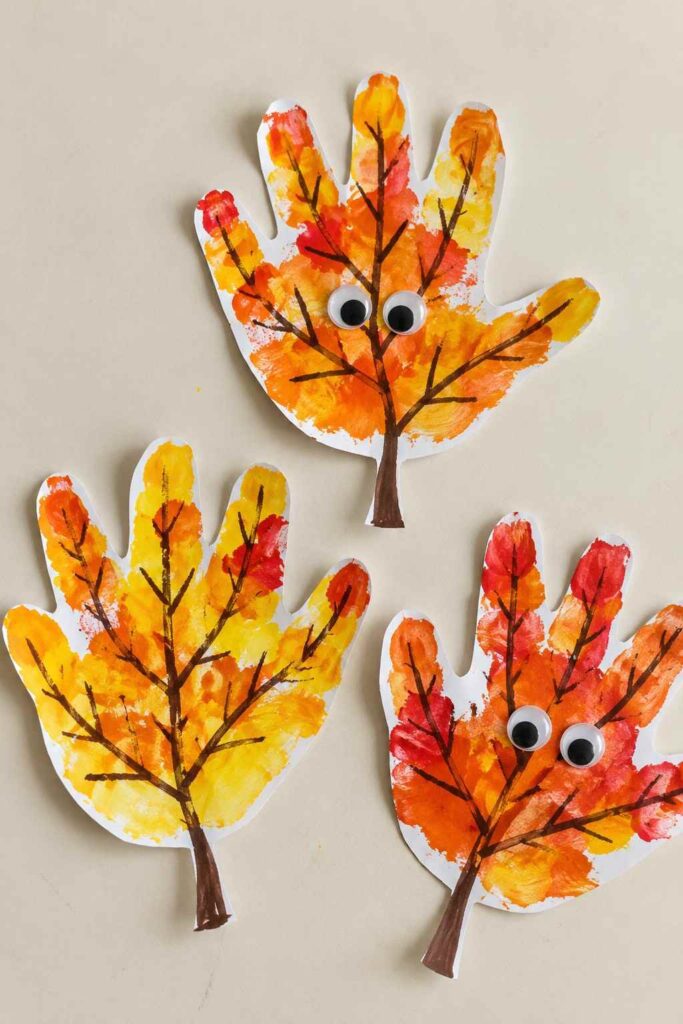
Turn little handprints into colorful autumn leaves! Kids can use yellow, orange, and red paint to create their own leafy designs, then add simple brown branches and googly eyes for a fun, friendly look. It’s an easy fall art activity for preschoolers and kindergarteners.
Materials Needed:
- White cardstock or construction paper
- Yellow, orange, and red washable paint
- Brown marker or paint
- Googly eyes (optional)
- Paintbrush
- Child-safe scissors
- Glue stick
How to Make It:
- Trace your child’s hand on white paper and cut out the handprint shape.
- Dab yellow, orange, and red paint over the fingers and palm, letting the colors mix naturally.
- Once dry, draw a few brown leaf veins and a long stem with a marker.
- Glue on two googly eyes to turn the leaf into a silly little fall character.
Quick Tip: Make handprints in different sizes and let kids mix the paint freely. Every leaf will turn out a little different!
18. Paper Pumpkin Harvest Truck Craft for Kids
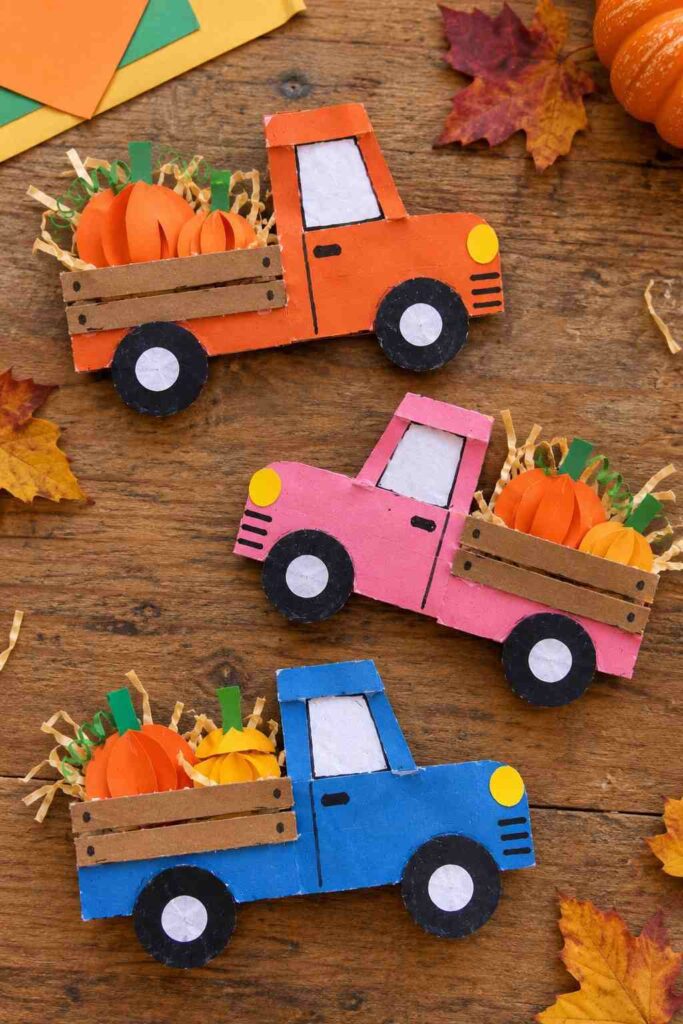
Create a cute little fall pickup truck using construction paper and recycled cardboard! Fill its tiny truck bed with colorful paper pumpkins and shredded paper to give it a fun autumn harvest look. It’s a lovely craft for kids who enjoy vehicles and fall decorations.
Materials Needed:
- Orange, blue, pink, brown, and green construction paper
- Recycled cardboard
- White and black paper scraps
- Glue stick
- Child-safe scissors
- Black marker
- Yellow paper
How to Make It:
- Draw a simple pickup truck shape on cardboard and cut it out. Cover it with your favorite colored paper.
- Cut out two large black paper circles for wheels and add smaller white circles in the middle.
- Make a square window using white paper and draw the door and headlights with a marker.
- Add two or three narrow brown cardboard strips to create the truck bed.
- Cut small orange paper pumpkins, add green stems, and place them in the back of the truck.
- Finish with a few thin yellow paper strips to look like straw.
Quick Tip: Use an old cereal box for the truck base. Slightly uneven paper pumpkins and hand-cut wheels make each truck look unique.
19. Funny Paper Bug Craft for Kids
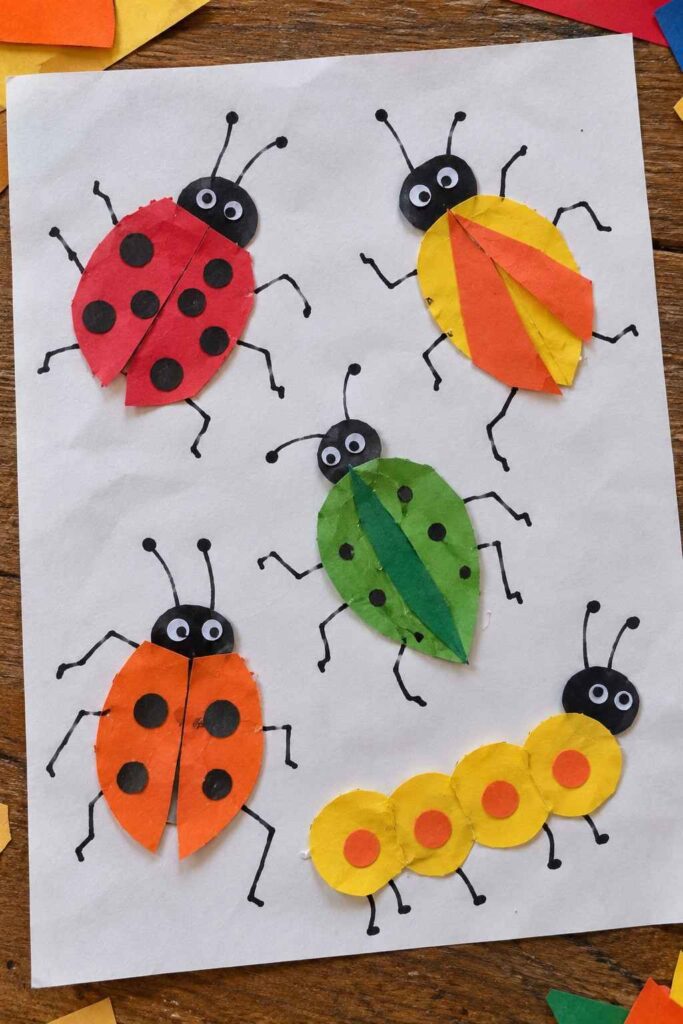
Turn colorful construction paper into silly little bugs! Kids can create ladybugs, leaf bugs, and a cute caterpillar using simple paper shapes and marker-drawn legs. This easy fall craft is a fun way to use autumn colors and enjoy a little creative play.
Materials Needed:
- Red, yellow, orange, and green construction paper
- White paper
- Black marker
- Glue stick
- Child-safe scissors
- Googly eyes (optional)
How to Make It:
- Cut simple oval and leaf shapes from colorful construction paper to make bug bodies.
- Cut small black circles for heads and spots, then glue them onto the bodies.
- Draw funny, slightly bent legs and antennae with a black marker.
- Add tiny paper eyes or googly eyes to give each bug a silly expression.
- For a caterpillar, glue several small colored paper circles in a row.
Quick Tip: Let kids make each bug a different size and give them funny names. Slightly uneven shapes make every creation special.
20. Colorful Paper Handprint Fall Wreath
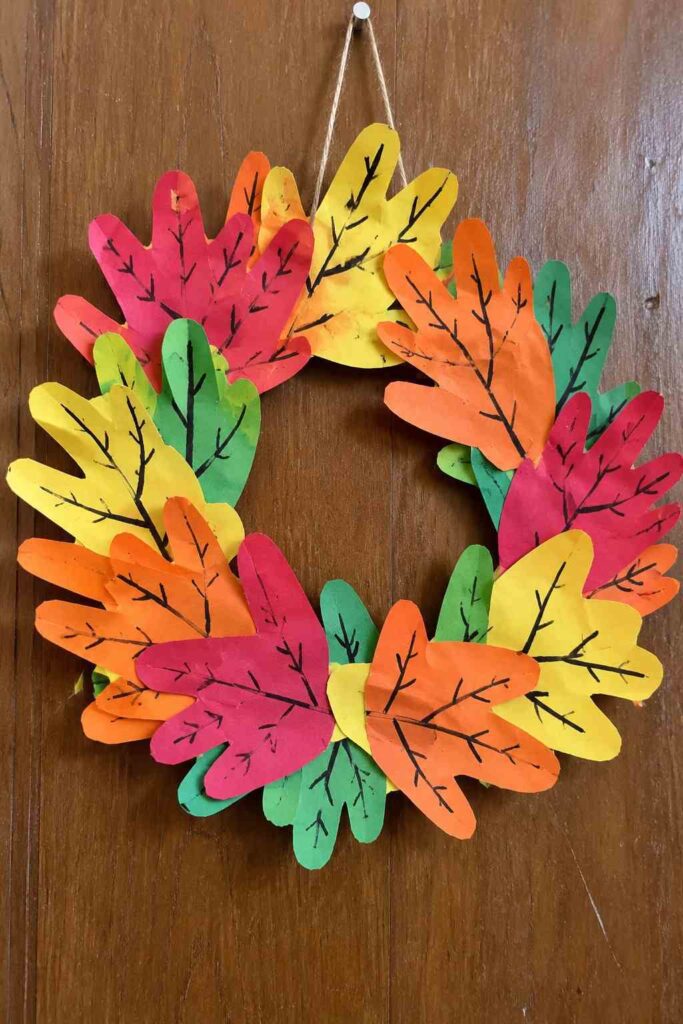
Make a cheerful fall wreath using colorful paper handprints! This easy craft turns simple construction paper into a bright autumn decoration that kids can help create for the front door or classroom.
Materials Needed:
- Red, orange, yellow, and green construction paper
- Black marker
- Cardboard
- Glue stick
- Child-safe scissors
- String or ribbon
How to Make It:
- Trace your child’s hand on different colored papers and cut out several handprints.
- Draw simple branch-like lines on each handprint using a black marker.
- Cut a large cardboard ring and glue the handprints around it, overlapping them slightly.
- Add more paper hands to fill empty spaces and create a colorful wreath.
- Attach a small piece of string at the top for hanging.
Quick Tip: Mix large and small handprints, and don’t worry if the shapes overlap unevenly. That’s what gives the wreath its handmade charm!
21. Colorful Paper Turkey Craft for Kids
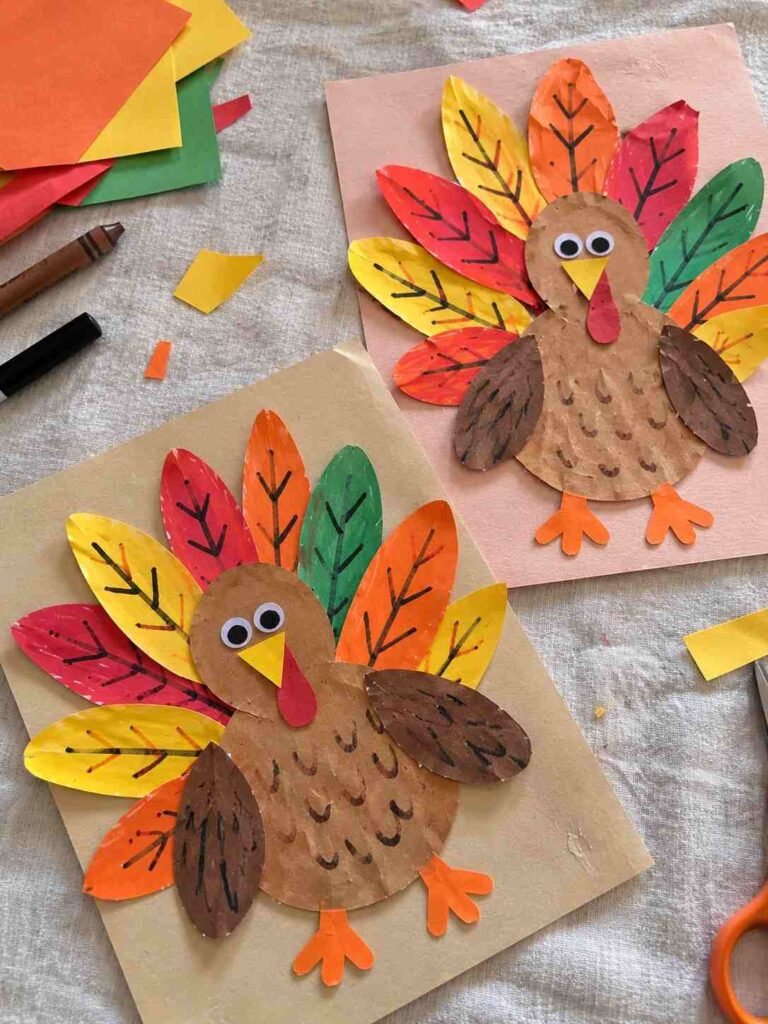
Make a cheerful Thanksgiving turkey using colorful construction paper! Kids can create a fan of bright autumn feathers and give their turkey a funny little face. It’s a simple paper craft for a fall afternoon at home or in the classroom.
Materials Needed:
- Brown, red, orange, yellow, and green construction paper
- White paper
- Googly eyes
- Glue stick
- Child-safe scissors
- Black and brown markers
How to Make It:
- Cut 5–7 long leaf-shaped feathers from colorful paper. They don’t need to be exactly the same size.
- Draw simple feather lines with a marker and glue the feathers in a fan shape.
- Cut a round brown head and a larger oval body. Glue them over the bottom of the feathers.
- Add googly eyes, a small yellow triangle beak, and a red paper wattle.
- Cut two simple orange feet and glue them underneath the body.
Quick Tip: Let kids choose their own feather colors and draw silly expressions. Each turkey will have its own personality!
Final Thoughts
Fall is a wonderful time to slow down, get creative, and enjoy simple activities with kids. These 21 easy fall crafts are a fun way to turn everyday materials, colorful leaves, and basic craft supplies into something special.
You don’t need a big budget or fancy supplies to make beautiful fall memories. Sometimes, a little paper, glue, and a few colorful leaves are all you need to keep little hands busy and happy.
Try a few of these projects at home, use your favorite fall colors, and let your kids add their own creative touches. The best part isn’t making everything perfect—it’s enjoying the time spent creating together!
Which of these fall crafts would your kids love to make first? Share your favorite idea in the comments. We’d love to hear from you!
Love decorating pumpkins? Explore these Easy Pumpkin Painting Ideas for more creative ways to celebrate fall.
More Seasonal DIY Ideas
If you enjoyed these fall crafts, here are a few more creative projects to try next: