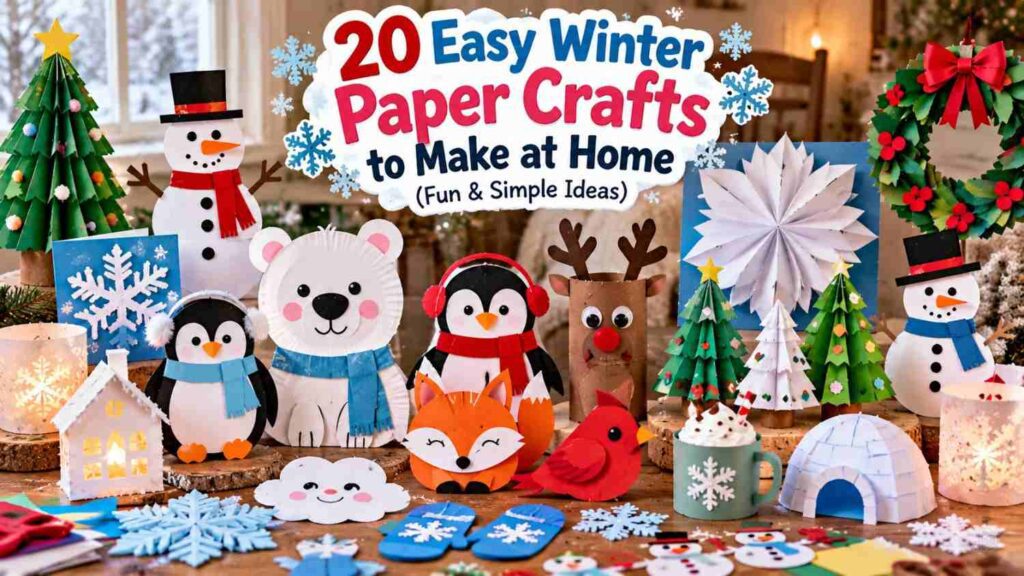
When the weather gets cold, there’s nothing better than spending a cozy afternoon making something fun with paper. From snowy window decorations to cute little winter scenes, these easy winter paper crafts are a simple way to keep kids and adults busy on chilly days.
Most of these projects use basic supplies like construction paper, scissors, and glue, so you won’t need an expensive trip to the craft store. Whether you’re looking for a fun snow day activity, a little seasonal home decor, or a creative project to enjoy with your kids, you’ll find plenty of ideas to try.
If you enjoy making things with simple materials, explore these waste material DIY projects for more creative ideas you can try at home.
Why You’ll Love These Winter Paper Crafts
- Easy to make: Most projects use simple materials you probably already have at home.
- Budget-friendly: Paper crafts are an inexpensive way to enjoy a creative afternoon.
- Fun for all ages: You’ll find ideas for kids, family craft time, and simple winter decorations.
- Perfect for snowy days: Keep everyone entertained when it’s too cold to spend much time outside.
Basic Supplies You’ll Need
Before you start, gather a few everyday craft supplies:
- Construction paper and cardstock
- White, blue, and other colored paper
- Child-safe scissors
- Glue sticks or craft glue
- Pencil and ruler
- Markers or crayons
- Tape
- Optional decorations, such as ribbon or small paper scraps
You don’t need every supply for every project. Each craft will have its own materials and step-by-step instructions.
1. Rotating Winter Window Craft
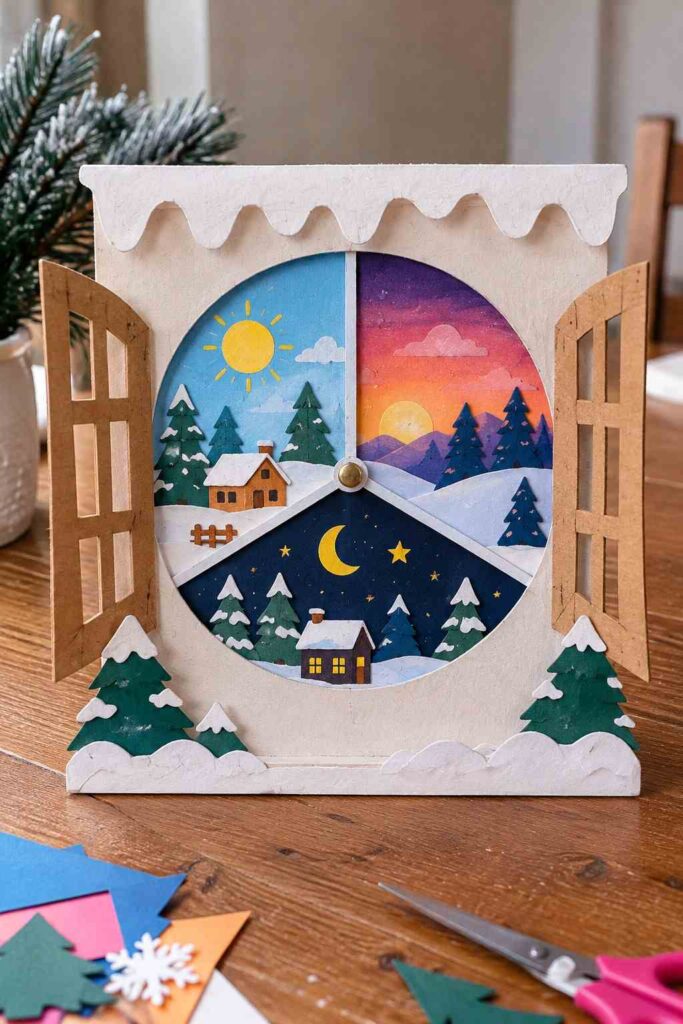
Make a cute winter window that changes from a snowy day to a colorful sunset or a starry night. This creative paper craft uses simple supplies and makes lovely seasonal decor.
Materials
- Cardstock and colored construction paper
- Sturdy cardboard
- Scissors, glue, and markers
- Pencil and ruler
- One paper fastener (brad)
How to Make It
- Cut a window frame from cardboard, leaving an opening in the center.
- Cut a paper circle and divide it into three winter scenes: daytime, sunset, and nighttime.
- Decorate each section with snowy trees, little houses, sunshine, or stars.
- Attach the circle to the cardboard backing with a paper fastener so it can rotate.
- Place the frame over the circle and turn the wheel to reveal each scene.
Tip: Test the rotating wheel before gluing everything in place to make sure it turns smoothly.
2. 3D Paper Snowy Pine Trees
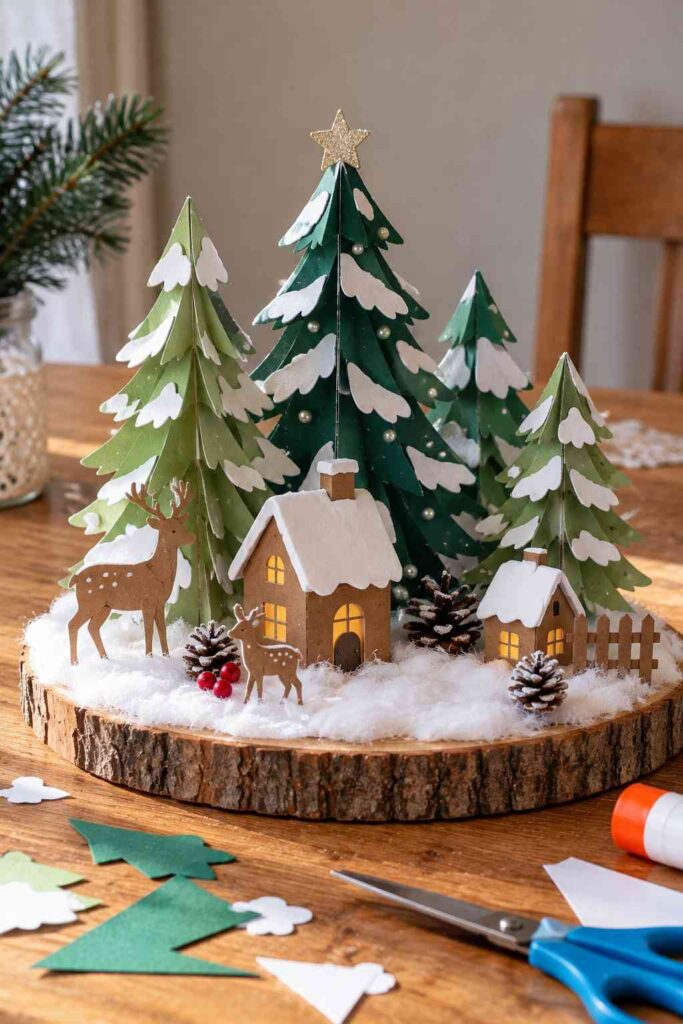
Create a tiny winter forest with layered paper trees and fluffy-looking snow. These simple decorations look lovely on a mantel, shelf, or winter-themed table.
Materials
- Green and white cardstock
- Scissors and glue
- Pencil and ruler
- Small pieces of brown paper
How to Make Them
- Fold green cardstock in half and draw half a pine tree along the fold.
- Cut out the tree and repeat to make three or four matching shapes.
- Fold each tree down the middle, then glue the folded halves together to create a 3D effect.
- Add small white paper pieces to the branches for snow.
- Attach a brown paper trunk and gently spread the layers so the tree stands out.
Tip: Use different shades of green and slightly uneven snow pieces to give each tree a natural, handmade look.
3. Accordion-Fold Winter Trees
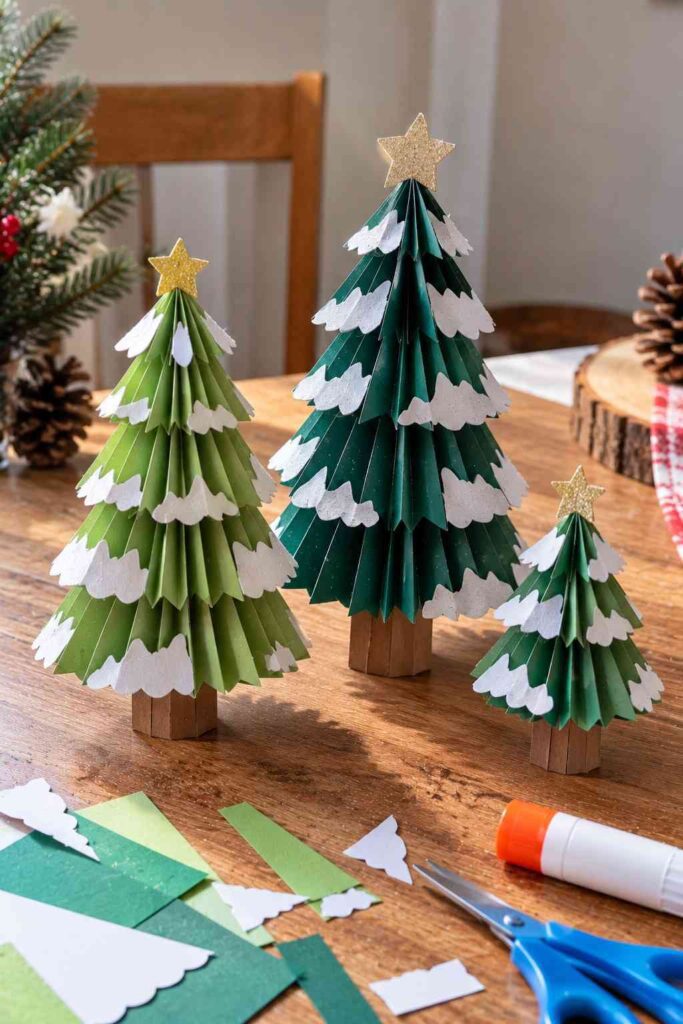
These little paper trees bring a cozy winter-forest look to your home. Their folded branches give them a fun 3D shape, and you can make them in different sizes for a simple winter display.
Materials
- Green and white construction paper
- Scissors and glue
- Small pieces of brown paper
- Pencil and ruler
How to Make Them
- Cut green paper into strips of different lengths.
- Fold each strip back and forth like an accordion.
- Stack the folded strips from longest to shortest to form a tree shape.
- Glue the layers together and add a small brown-paper trunk.
- Add a few white paper snow patches to finish your winter trees.
Tip: Use slightly uneven folds and different shades of green to give each tree a handmade look.
4. Colorful Paper Snowflake Suncatchers
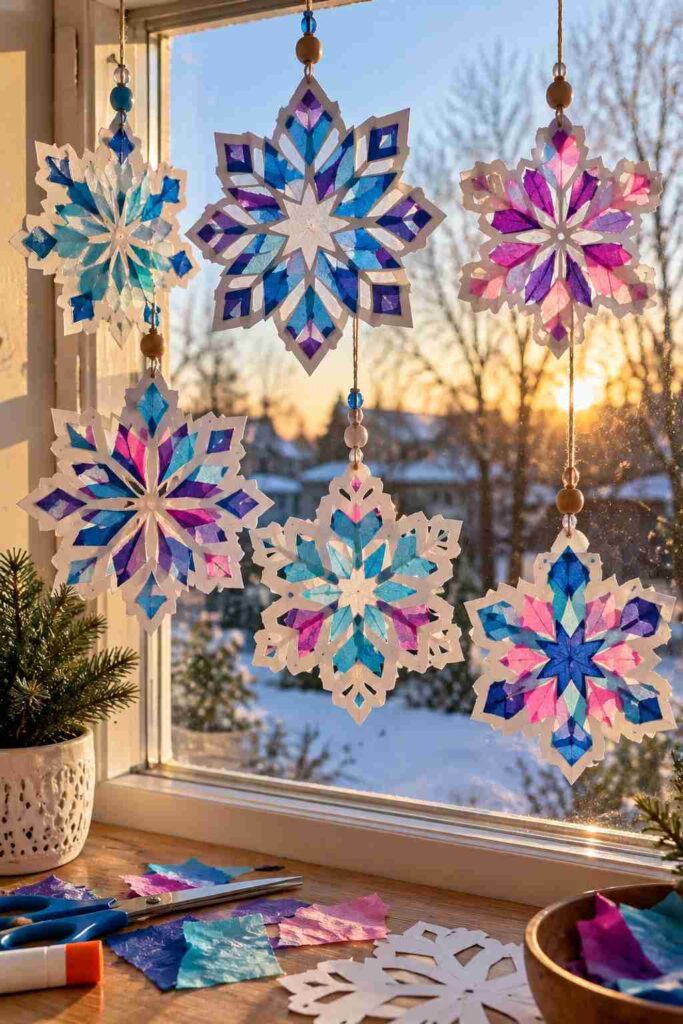
Brighten a winter window with these colorful paper snowflakes. When sunlight shines through the tissue paper, the colors create a pretty stained-glass effect.
Materials
- White cardstock or paper
- Colored tissue paper
- Scissors and glue
- Clear contact paper (optional)
How to Make Them
- Fold white paper and cut out a simple snowflake shape.
- Cut small pieces of colorful tissue paper.
- Place the tissue pieces behind the snowflake openings and glue them in place.
- Trim the extra tissue paper around the edges.
- Hang your finished snowflake near a sunny window.
Tip: Mix blue, purple, and pale pink tissue paper for a soft winter look.
5. Cute 3D Paper Snowman Decorations
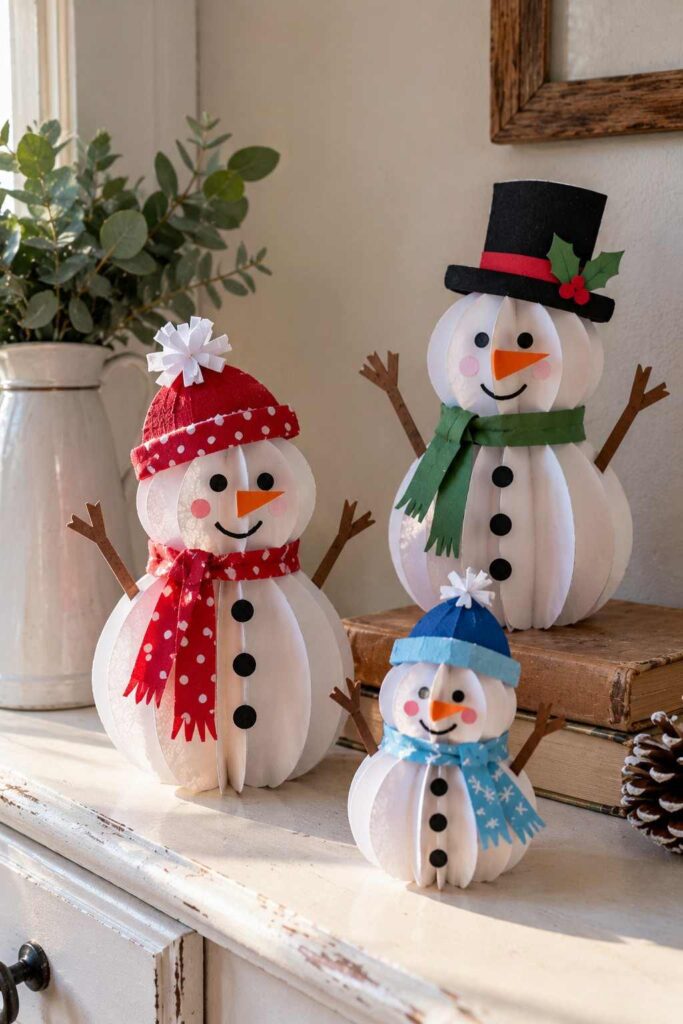
Make adorable little snowmen from white paper for a fun winter display. These simple decorations are perfect for a mantel, kids’ room, or cozy winter craft table.
Materials
- White, black, and orange cardstock
- Scissors and glue
- Black marker
- Small paper scraps for scarves
How to Make Them
- Cut several equal-sized circles from white cardstock.
- Fold each circle in half and glue the halves together to create a rounded 3D shape.
- Cut a small black hat, an orange carrot nose, and a colorful paper scarf.
- Glue on the face, hat, and scarf.
- Add paper buttons and let your snowman dry before displaying it.
Tip: Make a family of snowmen in different sizes for an extra-cute winter decoration.
For another colorful project to make with kids, try these easy construction paper flower ideas.
6. Cozy Woven Paper Winter Mittens
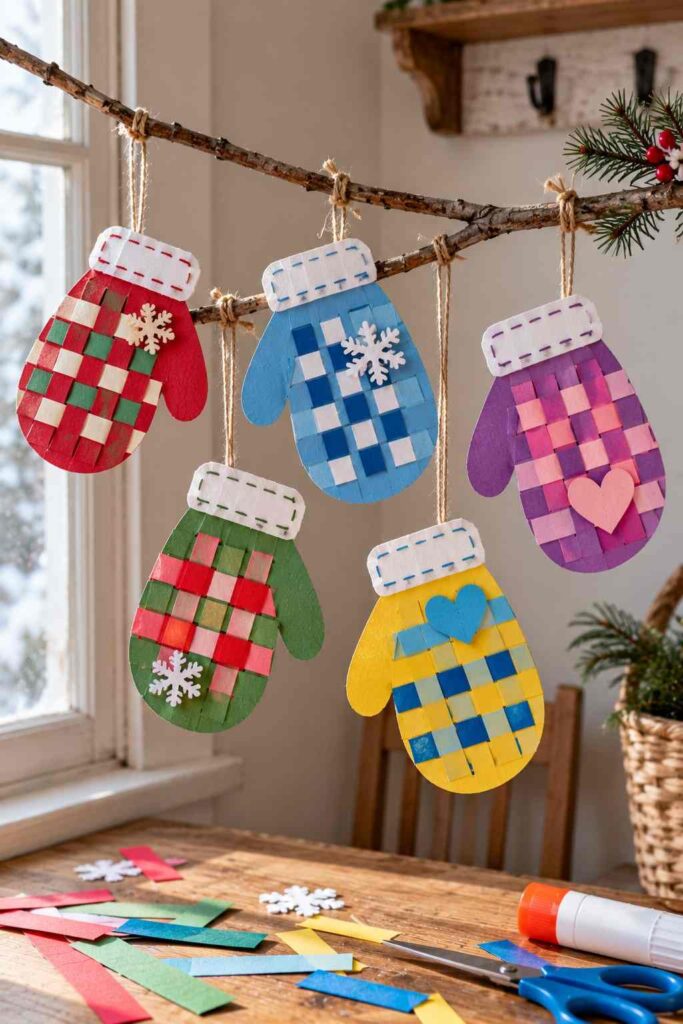
These colorful paper mittens are a fun winter craft for kids and make cute decorations for a snowy-day display.
Materials
- Colored construction paper
- Scissors and glue
- Pencil
- Small paper scraps for decoration
How to Make Them
- Draw two mitten shapes on colored paper and cut them out.
- Cut several short slits across the center of each mitten, leaving the edges intact.
- Cut thin strips of contrasting paper and weave them over and under the slits.
- Glue the strip ends to the back and trim any extra paper.
- Add paper cuffs, dots, hearts, or snowflakes to decorate your mittens.
Tip: Mix two or three winter colors to make each mitten stand out.
Looking for more ways to reuse everyday materials? Check out these easy toilet paper roll crafts for kids for another fun DIY project.
7. Glowing Paper Winter Village Lanterns

Create a charming little winter village using paper houses and warm LED tea lights. This craft makes a cozy decoration for a mantel or windowsill.
Materials
- White and colored cardstock
- Scissors and glue
- Pencil and ruler
- Black marker
- Battery-operated LED tea lights
How to Make Them
- Cut cardstock into rectangles and fold them into small box-shaped houses.
- Cut tiny windows and doors into each house.
- Add folded paper roofs, chimneys, and simple snowy details.
- Arrange the houses together on a tray or shelf.
- Place battery-operated LED tea lights behind the houses to create a warm glow.
Tip: Use white paper for a snowy village or kraft paper for a rustic look. Never use real candles with paper crafts.
8. Origami Penguin Corner Bookmarks
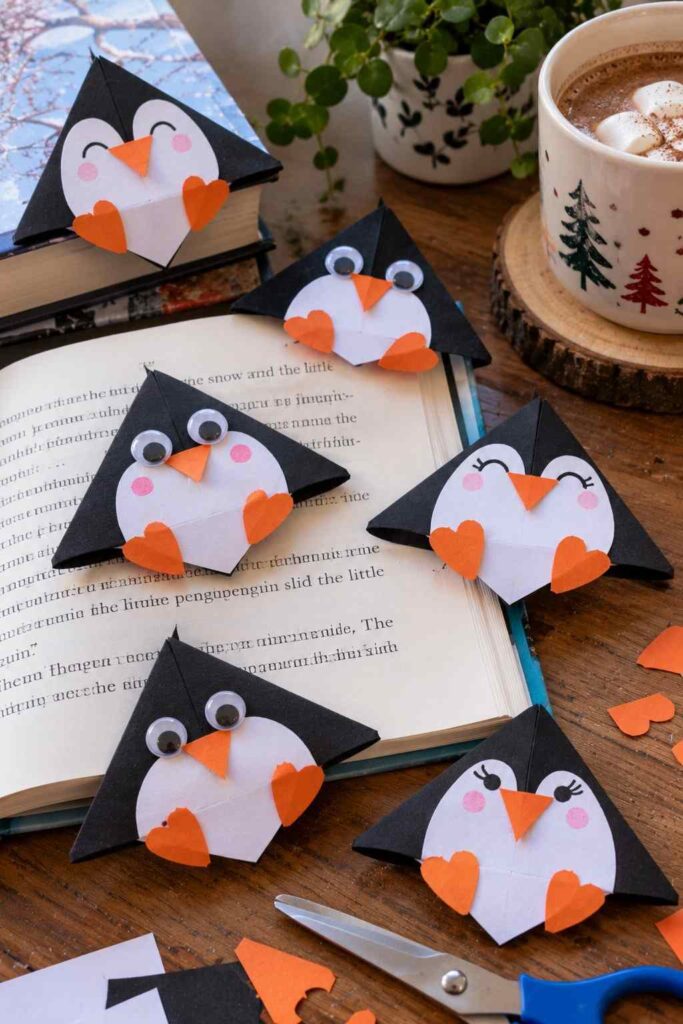
These cute penguin bookmarks are easy to make with paper and are perfect for little readers on chilly winter days.
Materials
- Black, white, and orange construction paper
- Scissors and glue
- Black marker
How to Make Them
- Fold a square piece of black paper into a corner bookmark.
- Cut a white oval or heart-shaped piece for the penguin’s belly.
- Glue it onto the front of the folded corner.
- Add two small eyes and an orange paper beak.
- Cut tiny orange feet and glue them near the bottom.
Tip: Make a few penguins with different expressions to create a fun set of winter bookmarks.
9. Rustic Rolled Paper Pinecone Wreath
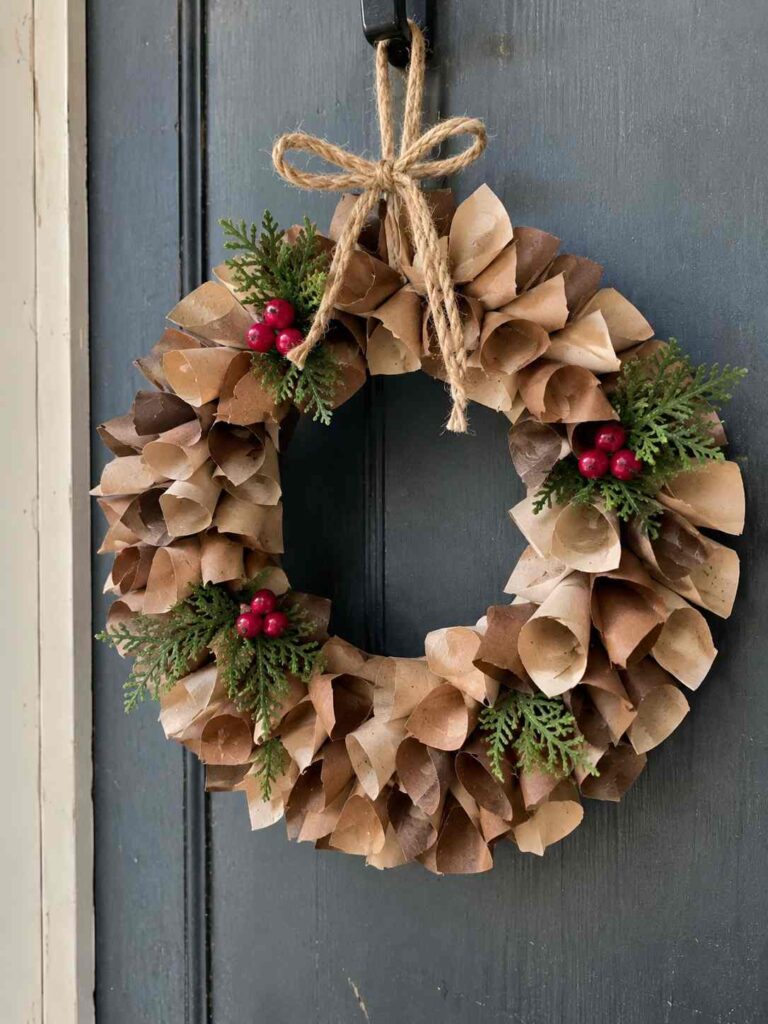
Turn leftover paper into a charming winter wreath with rolled-paper pinecones. This craft adds a cozy, natural touch to a front door or wall.
Materials
- Brown kraft paper or cardstock
- Cardboard for the wreath base
- Scissors and glue
- Pencil
- Twine or ribbon
How to Make It
- Cut brown paper into small squares and roll each piece into a cone.
- Cut a cardboard ring for the wreath base.
- Glue the paper cones around the ring, overlapping them slightly.
- Add another layer of cones to create a fuller look.
- Finish with a simple twine bow and let the glue dry before hanging.
Tip: Mix light and dark brown paper for a more natural pinecone effect.
10. Layered Paper Winter Mountain Landscapes
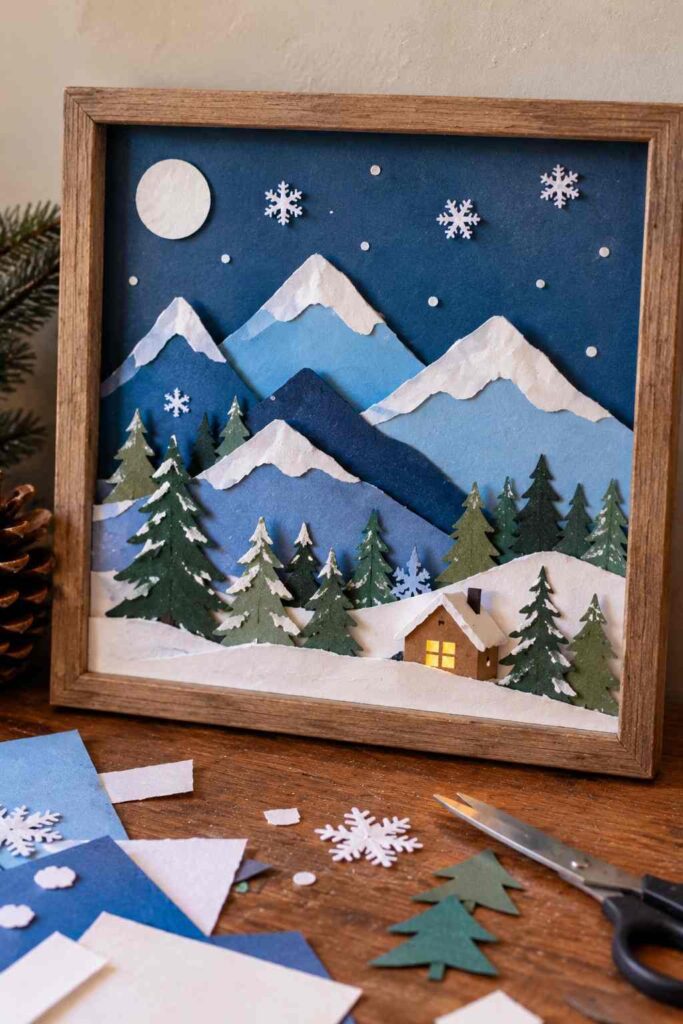
Create a peaceful winter landscape with layers of paper mountains, snowy peaks, and tiny evergreen trees. This simple craft makes lovely seasonal wall art.
Materials
- Blue, white, and green cardstock
- Scissors and glue
- Pencil
- Cardstock for the background
How to Make It
- Cut blue and white paper into uneven mountain shapes.
- Glue the largest mountains onto the background first.
- Add smaller mountain layers in front to create depth.
- Cut tiny green evergreen trees and glue them along the bottom.
- Add white paper snowcaps and a few small snowflakes.
Tip: Use different shades of blue to make your winter landscape look deeper and more interesting.
11. Quilled Paper Snowflake Greeting Cards
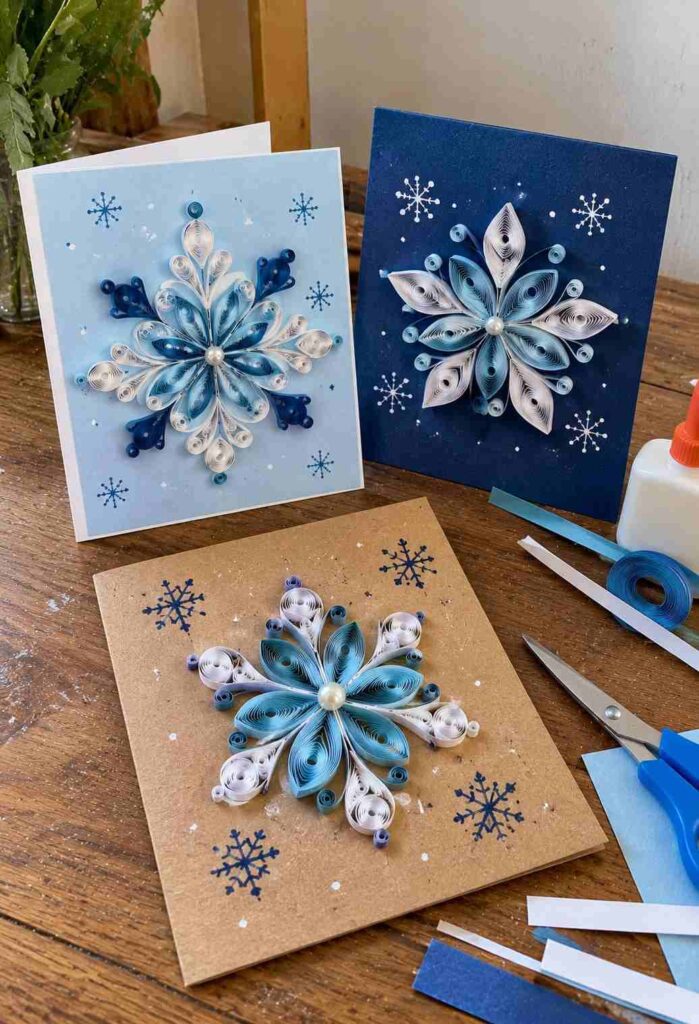
Make delicate winter greeting cards with rolled paper strips arranged into snowflake patterns. These handmade cards are perfect for holiday greetings or a thoughtful winter surprise.
Materials
- White or light blue cardstock
- Thin strips of colored paper
- Glue
- Scissors
- Pencil and ruler
How to Make Them
- Fold cardstock in half to create a greeting card.
- Roll thin paper strips around a pencil to make small loops.
- Arrange the loops into a snowflake pattern on the card.
- Glue the pieces in place, adding a small paper circle in the center.
- Write a short winter greeting inside once the glue dries.
Tip: Use white and icy blue paper for a simple, elegant snowflake design.
12. Cute Paper Snow Globe Collages
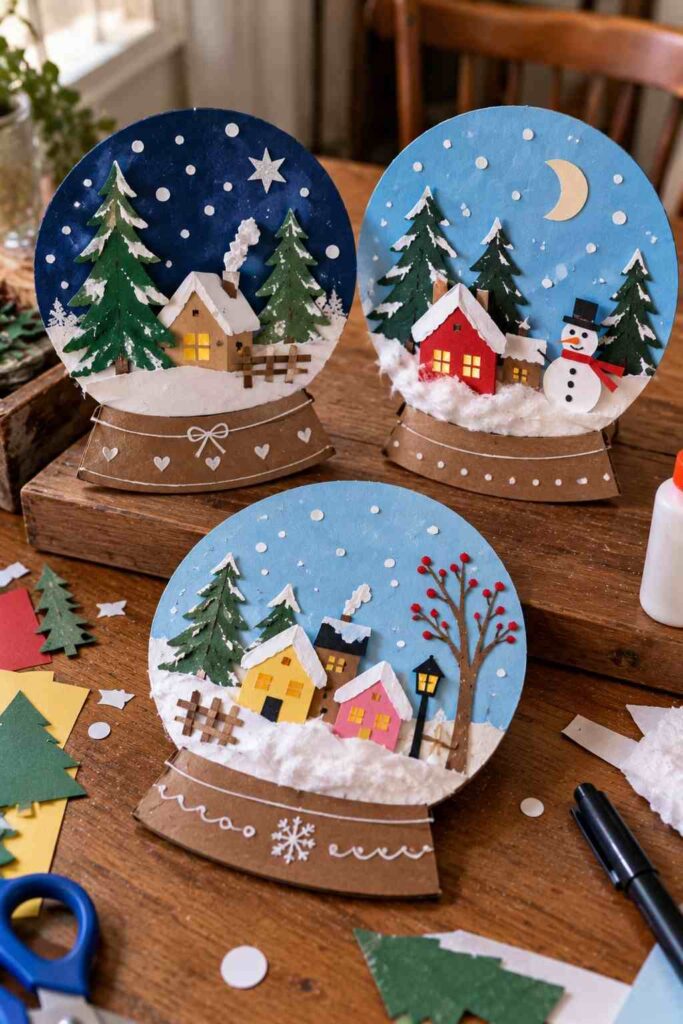
Make a winter wonderland inside a paper snow globe! This easy craft lets kids create their own snowy scene with little houses, trees, and falling snow.
Materials
- Blue and white cardstock
- Colored construction paper
- Scissors and glue
- Pencil and black marker
- Cotton balls (optional)
How to Make It
- Draw a large circle on blue cardstock and cut it out.
- Cut a small base from brown or colored paper and glue it beneath the circle.
- Add paper houses, evergreen trees, and snowy hills inside the globe.
- Cut tiny white paper circles and glue them around the scene like falling snow.
- Add a few white details to the base and let everything dry.
Tip: Use small paper scraps to create a colorful winter village without buying extra supplies.
13. Hanging Paper Icicle Mobiles
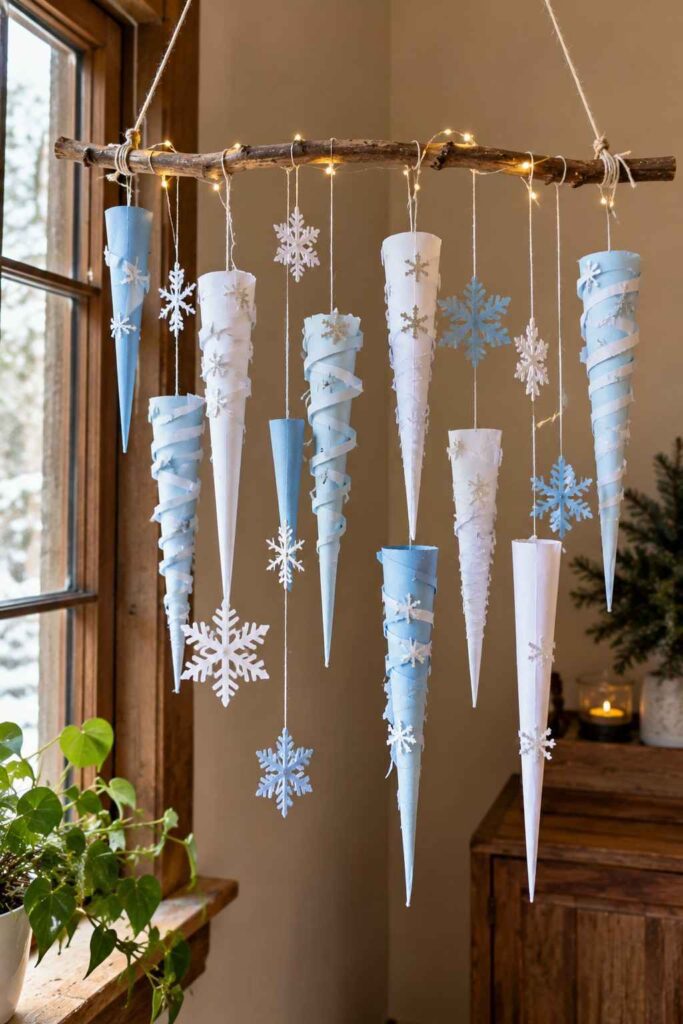
Bring a wintery touch to your windows with these delicate paper icicles. They’re easy to make with white and light blue paper and look pretty hanging at different lengths.
Materials
- White and light blue paper
- Scissors and glue
- Pencil and ruler
- Thread or string
- A stick or wooden dowel
How to Make Them
- Cut paper into long, narrow triangles of different lengths.
- Fold or curl each piece slightly to give it dimension.
- Add small white paper strips or snowflake cutouts for decoration.
- Attach thread to the top of each icicle.
- Tie the threads at different lengths along a stick and hang your mobile near a window.
Tip: Mix white, pale blue, and silver paper for a frosty winter look.
14. Torn-Paper Winter Cardinal Art
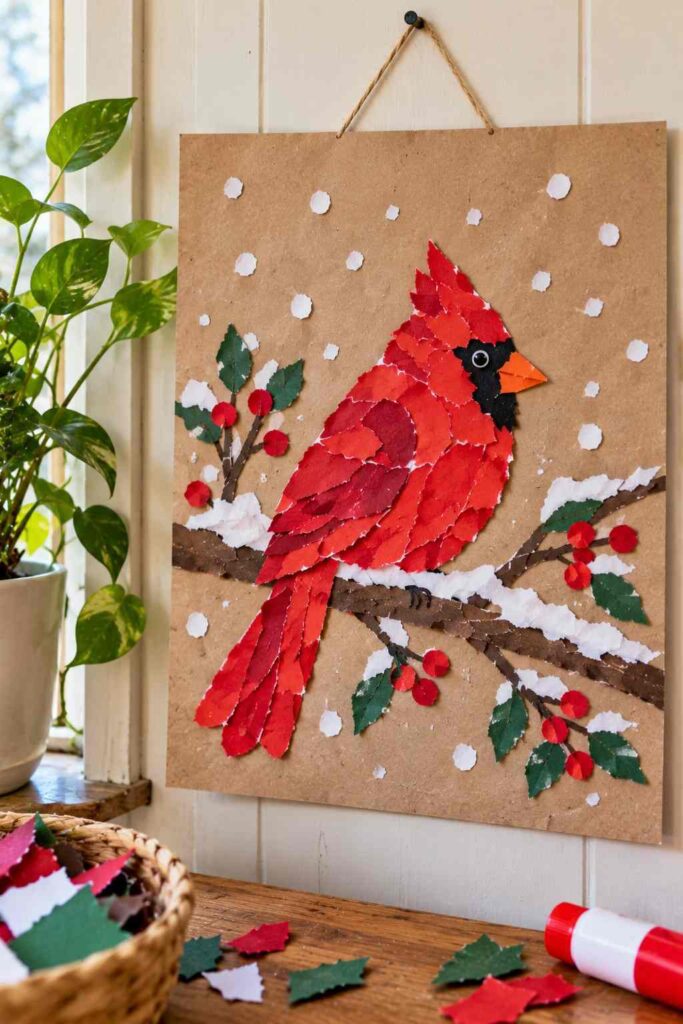
Create a charming winter bird picture using torn paper instead of scissors. This easy craft uses simple paper scraps to make a bright red cardinal sitting on a snowy branch.
Materials
- Red, black, white, and brown construction paper
- Blue cardstock for the background
- Glue stick
- Pencil
How to Make It
- Tear red paper into small pieces to form the cardinal’s body and head.
- Arrange and glue the pieces onto blue cardstock.
- Add black paper for the face mask, a small orange beak, and a white belly.
- Glue brown paper strips underneath to create a branch.
- Add torn white paper around the branch to look like snow.
Tip: Let the torn edges show for a lovely handmade texture.
15. Pop-Up Winter Cabin Greeting Cards
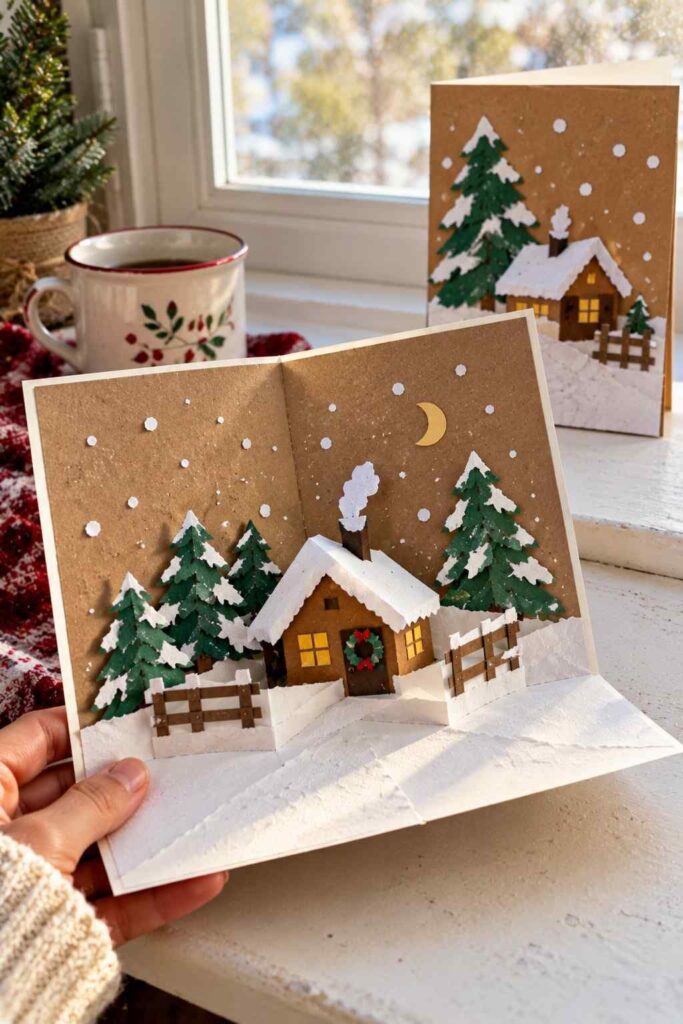
Make a sweet winter greeting card with a tiny paper cabin that pops up when you open it. This handmade card is perfect for sending warm wishes to friends and family.
Materials
- White and blue cardstock
- Brown, green, and red construction paper
- Scissors and glue
- Pencil and markers
How to Make It
- Fold a piece of cardstock in half to make your card.
- Cut two short parallel slits along the fold and push the tab inward.
- Cut a small cabin from brown paper and glue it onto the tab.
- Add a white paper roof, tiny windows, trees, and snowy details.
- Open and close the card gently to check that the cabin pops forward.
Tip: Keep the cabin small and lightweight so the pop-up tab works properly.
16. Paper Snowflake Window Garland
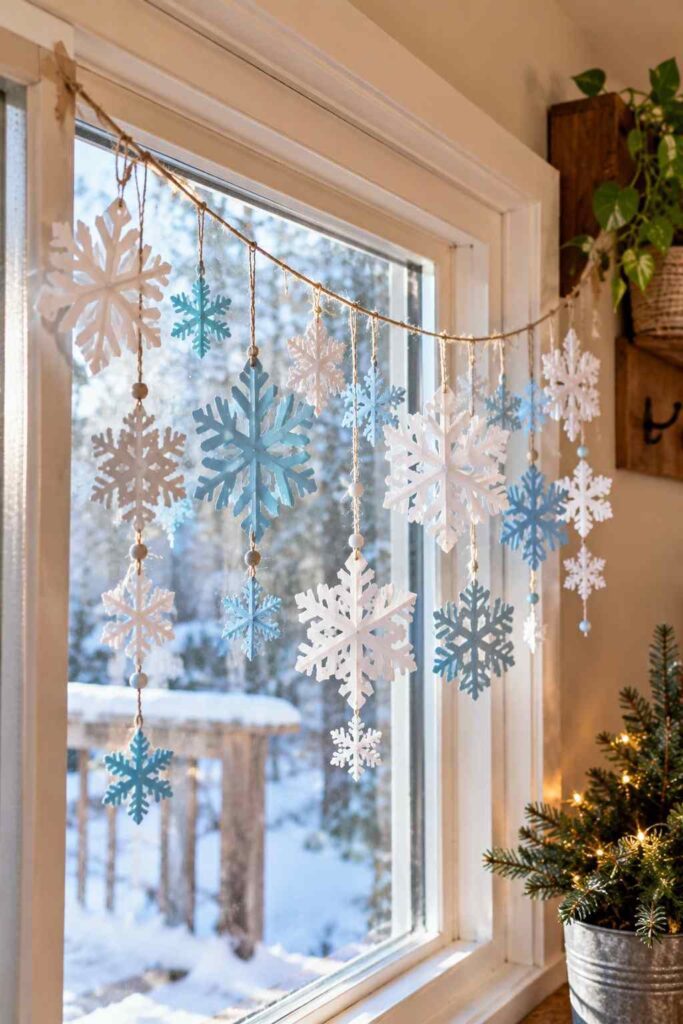
Decorate a window or doorway with a simple garland of handmade paper snowflakes. This budget-friendly winter craft is easy to customize with different shapes and colors.
Materials
- White, pale blue, and silver paper
- Scissors
- String or thread
- Tape or glue
How to Make It
- Fold white paper into small squares or triangles.
- Cut tiny shapes along the folded edges to create snowflakes.
- Carefully unfold each snowflake and flatten it.
- Attach the snowflakes to a length of string using tape or glue.
- Hang the garland across a window, doorway, or bedroom wall.
Tip: Mix large and small snowflakes and leave uneven gaps for a relaxed, handmade look.
17. 3D Paper Winter Village Houses
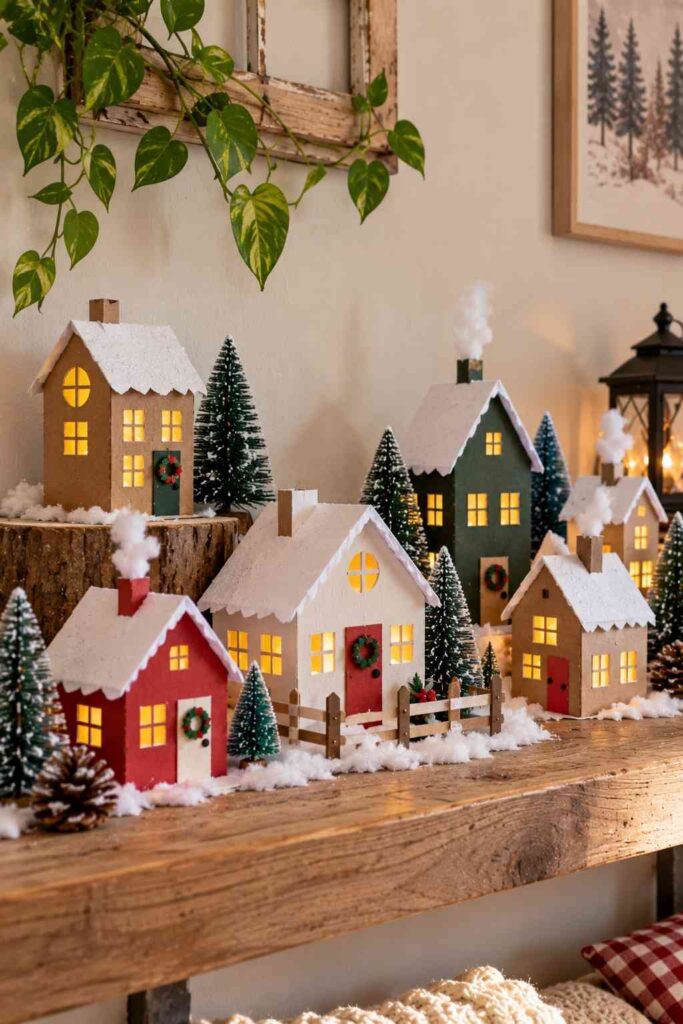
Make a tiny winter village using folded paper houses, snowy roofs, and miniature evergreen trees. These little decorations look lovely on a shelf or windowsill.
Materials
- White, brown, and colored cardstock
- Scissors and glue
- Pencil and ruler
- White paper scraps
- Markers
How to Make Them
- Cut cardstock into rectangles and fold each piece into a simple box-shaped house.
- Glue the edges together and add a triangular paper roof.
- Cut tiny windows and doors from contrasting paper.
- Add white paper along the roofs and around the houses to create snow.
- Arrange the houses with small paper trees to make your own winter village.
Tip: Use different house heights and colors to make your village look more interesting.
18. Paper Winter Bird Feeders
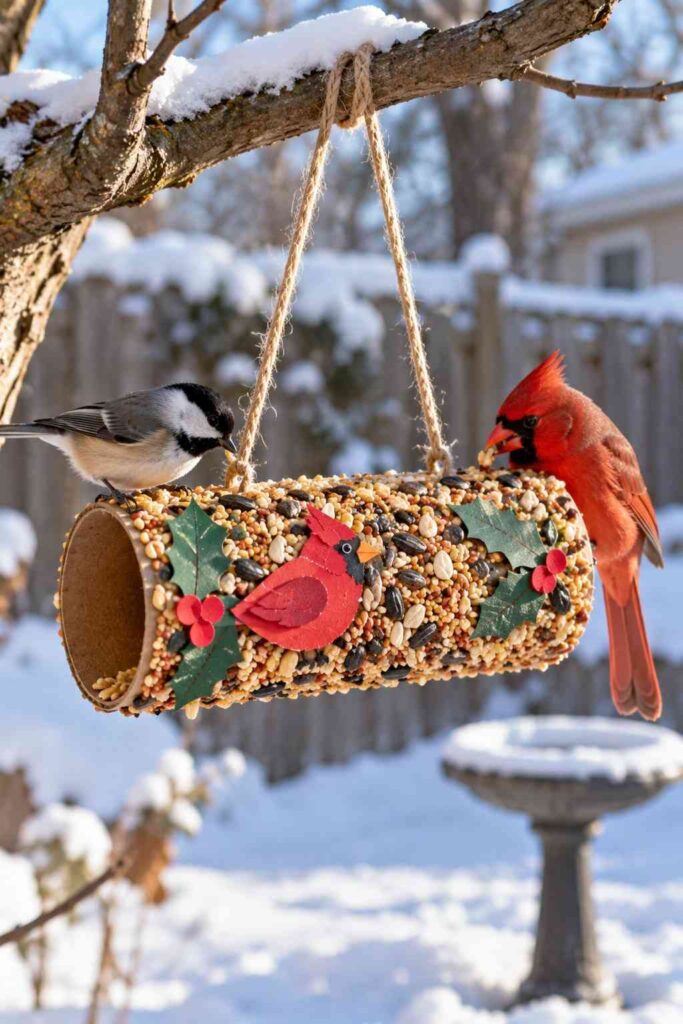
Make a simple paper bird feeder craft to celebrate winter wildlife. This project combines colorful paper with a bird-friendly idea for a fun seasonal activity.
Materials
- Brown cardstock or a small cardboard tube
- Colored paper scraps
- Glue and scissors
- String
- Birdseed and peanut butter (optional)
How to Make It
- Decorate a cardboard tube with small paper shapes, keeping the ends open.
- Spread a thin layer of peanut butter over the outside, if using.
- Roll the tube in birdseed until covered.
- Thread string through the tube and tie it securely.
- Hang it outdoors in a sheltered spot where birds can reach it safely.
Tip: Use plain, uncoated cardboard and avoid glitter, paint, or plastic decorations where birds may peck at them.
19. Paper Plate Winter Polar Bear
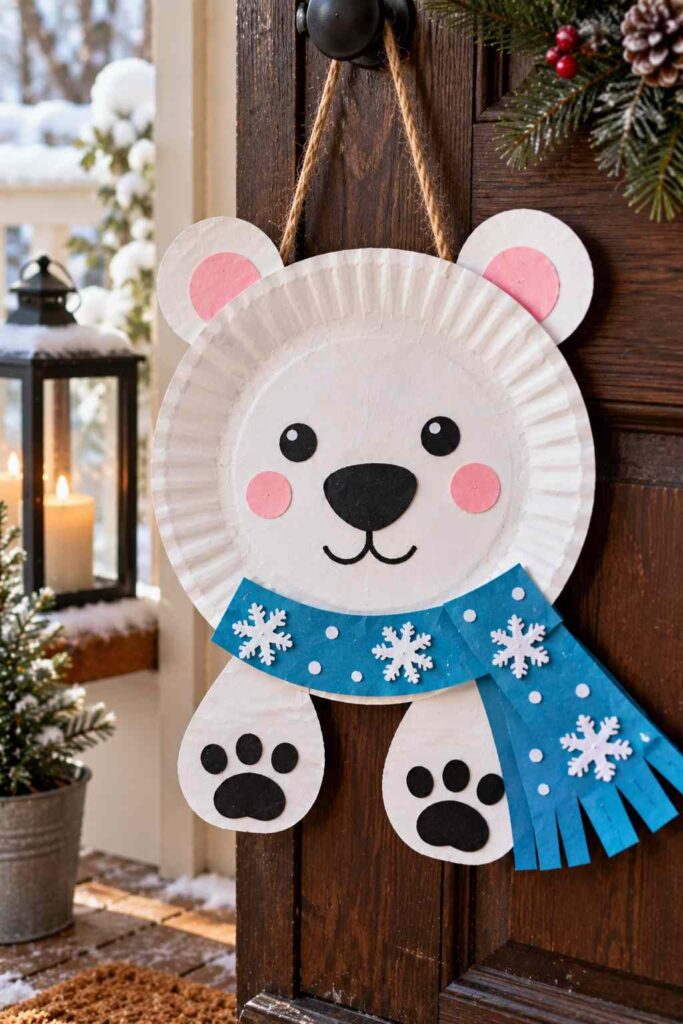
Make an adorable polar bear using a paper plate and a few scraps of construction paper. This easy winter craft is perfect for kids and looks cute on a bedroom wall or classroom display.
Materials
- White paper plate
- White, black, and blue construction paper
- Scissors and glue
- Black marker
How to Make It
- Cut two small white circles for the bear’s ears and glue them to the top of the plate.
- Cut a black oval for the nose and glue it near the center.
- Add two eyes and draw a simple curved mouth with a marker.
- Cut small blue paper snowflakes and glue them around the bear on a blue background.
- Let the glue dry before displaying your polar bear.
Tip: Add a paper scarf in a bright color to give your bear a playful winter look.
20. Folded Paper Winter Trees
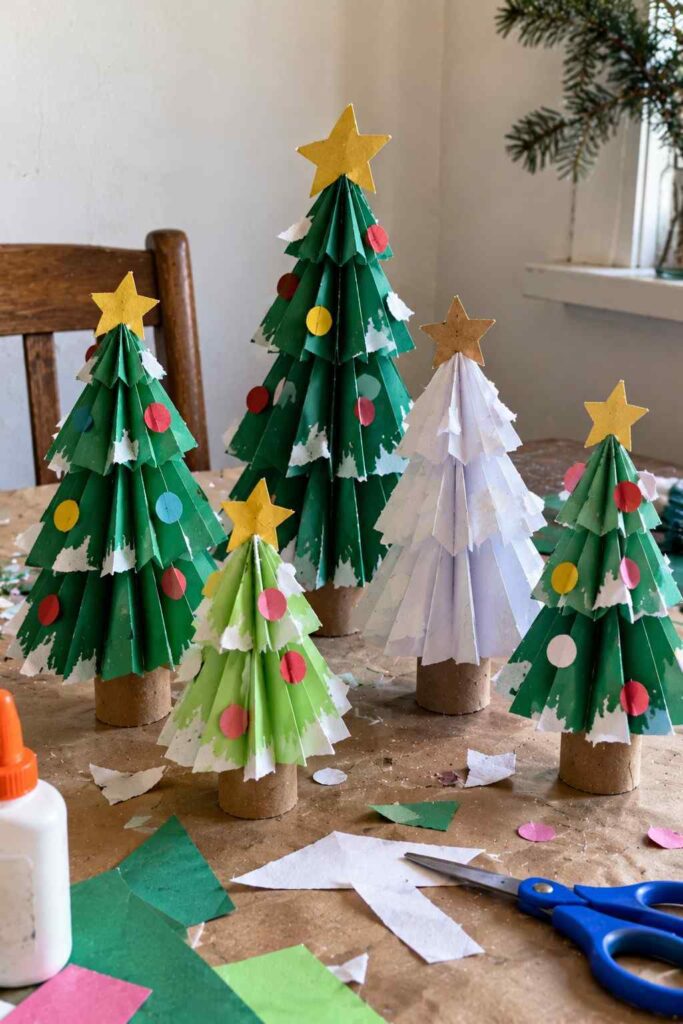
Make a little winter forest with folded paper trees in different sizes. This simple craft is a fun way to use leftover construction paper and create seasonal decorations.
Materials
- Green, white, or brown construction paper
- Scissors and glue
- Small cardboard pieces
- Pencil
How to Make Them
- Fold a sheet of green paper back and forth like a fan.
- Fold the accordion strip in half and glue the inner edges together.
- Spread the outer folds to create a fan-shaped tree.
- Attach a small cardboard trunk at the bottom.
- Add tiny white paper pieces for snow and make more trees in different sizes.
Tip: Mix dark green, mint, and brown paper to create a forest with varied colors.
Tips for Making Winter Paper Crafts Easier
- Use the right paper: Construction paper works well for simple crafts, while cardstock is better for sturdier decorations.
- Keep paper scraps: Save leftover pieces to make snowflakes, tiny trees, scarves, and other details.
- Fold carefully: Use a ruler or your fingernail to create neat folds for accordion trees and pop-up cards.
- Let the glue dry: Give each project enough time to dry before hanging or displaying it.
- Make each craft your own: Change the colors, shapes, and decorations to match your favorite winter style.
What are the easiest winter paper crafts to make?
Paper snowflakes, folded paper trees, paper snowmen, and simple winter collages are great choices for beginners. Most require only paper, scissors, and glue.
What supplies do I need for winter paper crafts?
You can get started with construction paper, cardstock, child-safe scissors, a glue stick, a pencil, and markers. Some projects may need extra supplies, such as string or a paper fastener.
What winter paper crafts can kids make?
Kids can enjoy making paper snowmen, penguin bookmarks, paper mittens, snowflake garlands, and winter animal pictures. Choose projects that match their ages and abilities, and supervise young children when using scissors.
How can I decorate my home with paper winter crafts?
Hang paper snowflakes in a window, display folded paper trees on a shelf, or arrange paper village houses on a mantel. Use lightweight decorations and secure them properly.
How can I make winter paper crafts on a budget?
Reuse leftover construction paper, cardboard packaging, and scraps from previous projects. Many winter crafts can be made without buying special decorations.
Final Thoughts
Winter is a wonderful time to slow down and enjoy simple creative projects at home. These 20 easy winter paper crafts offer plenty of ways to make snowflakes, winter animals, paper decorations, and cozy seasonal displays with everyday supplies.
Choose a project that fits your time and materials, gather your paper and glue, and have fun making something special. You can also change the colors and details to give every craft your own personal touch.
Want to try more budget-friendly crafts? Browse these genius egg carton crafts for more creative projects made with everyday materials.